Rooting an Android Emulator for Mobile Security Testing
Introduction
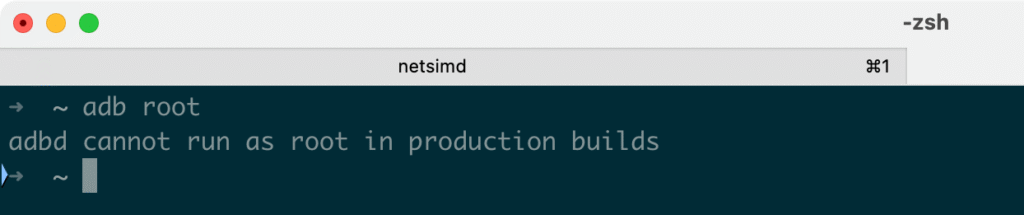
Rooting an Android emulator is essential for mobile app security research because it allows researchers to use powerful instrumentation and debugging tools that require root privileges. By obtaining full root (superuser) access on an AVD, you can modify system files, bypass certain security controls, and run apps or scripts that would otherwise be restricted. Many dynamic analysis tools and custom agents need actual root access to function properly. However, stock emulators, especially those using production build images do not grant true root access. For example, trying to run adb root on a standard Google Play emulator results in “adbd cannot run as root in production builds” as shown in the screenshot below:
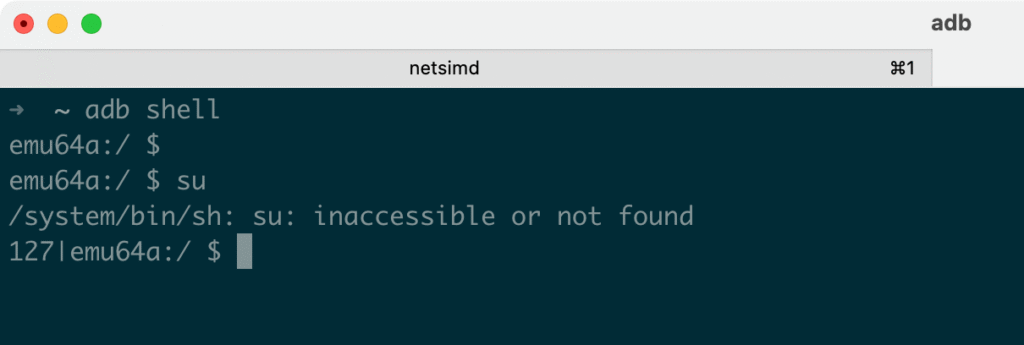
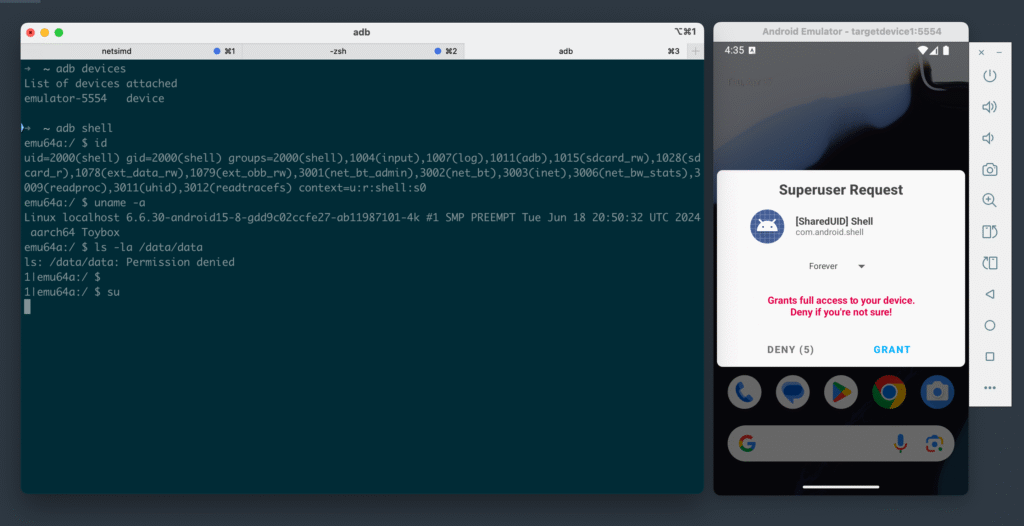
You’ll also note that using the command su on such standard images do not allow us to get superuser access on the device as shown in the screenshot below:
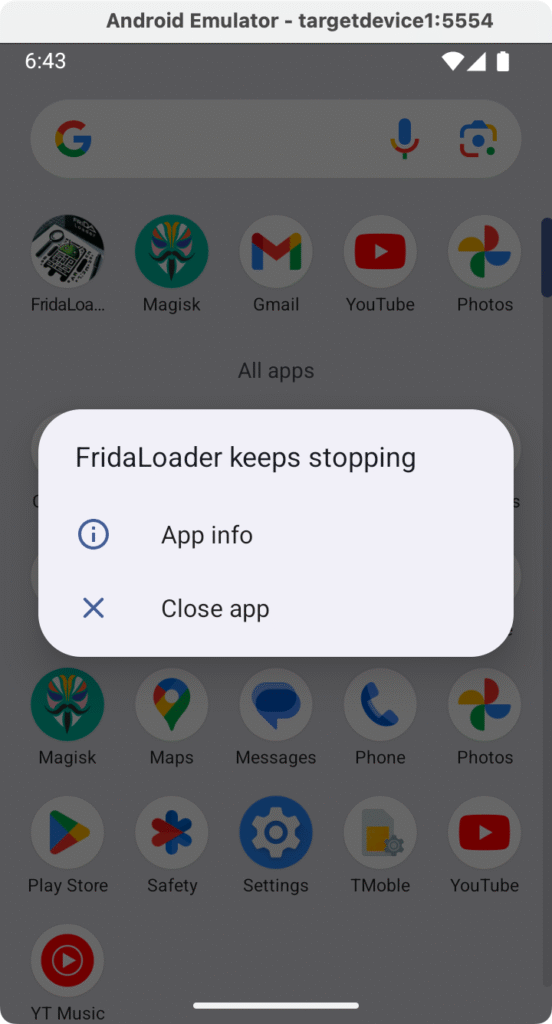
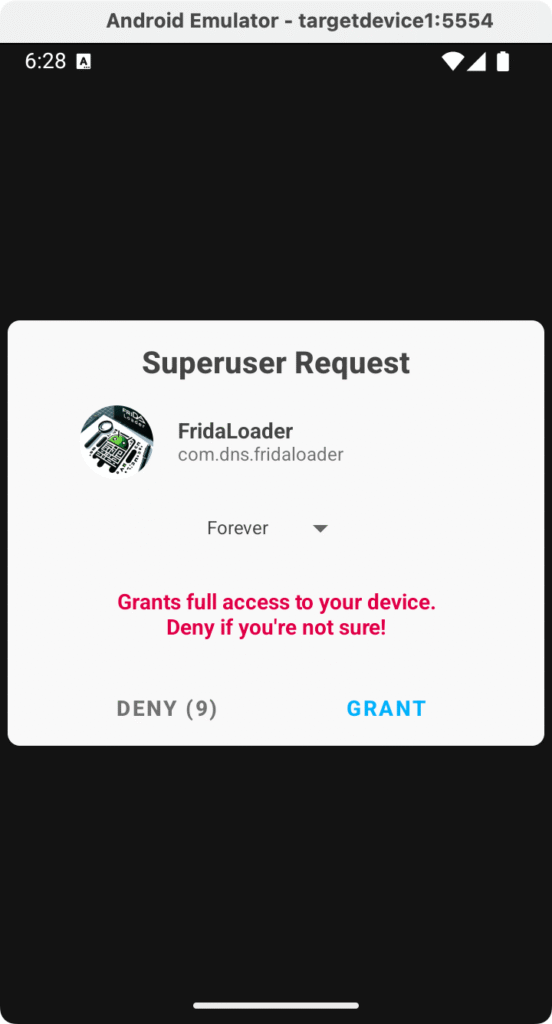
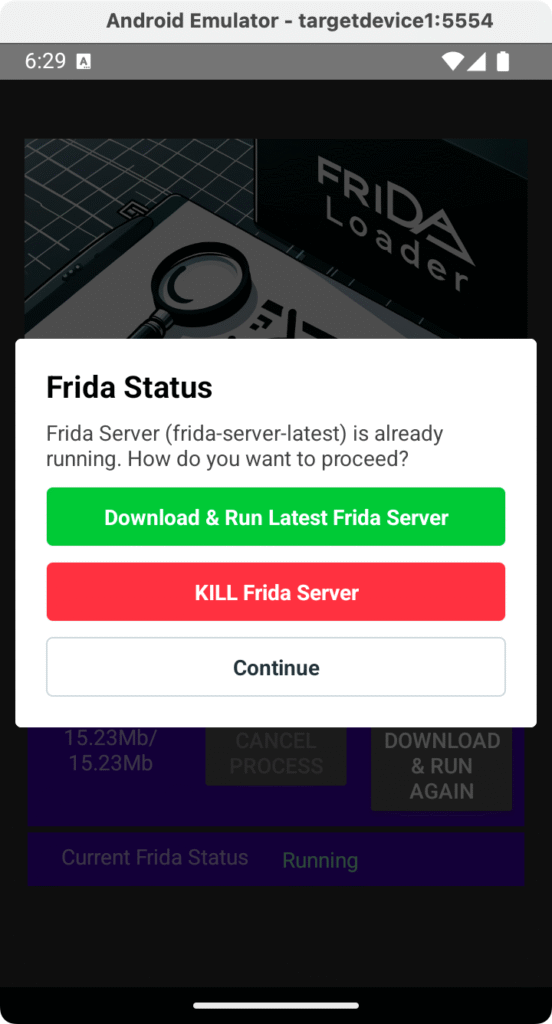
Sometimes, certain applications request for superuser permissions on the device, such applications will crash on the non-rooted Android device. The screenshot below shows how FridaLoader is such an application that crashes when launched on a device where there is no real “root access” on the Android device.
This means unrooted emulators will fail to run apps that require real root access, or will be detected and stopped by apps with root-detection mechanisms. In this blog, we demonstrate how to root an Android Virtual Device (AVD) using the open-source rootAVD tool so you can fully unlock the emulator for security testing.
Prerequisites
Before we begin, make sure you have the following set up:
-
Android Studio with the Android SDK installed on your macOS or Linux system. Ensure you have the latest SDK Platform Tools (which include
adb) and the Android Emulator package. -
Android Virtual Device (AVD) created (we will create one targeting API Level 35 (Android 15) in the steps below). Use an AVD with Google Play Services for realistic app behavior. Note that such images are normally non-rootable without this process. This means commands like
sushould fail. -
Git installed to clone the rootAVD repository.
-
Internet connection: The rooting script will download the Magisk binaries during the process.
-
Command-line environment configured: On macOS/Linux, add the Android SDK’s tools to your
PATHso thatadbandemulatorcan be invoked from the terminal. After updating PATH, open a new terminal and test withadb --versionandemulator -list-avdsto ensure the tools are accessible.
macOS (Zsh/Bash): Add lines to your ~/.zshrc or ~/.bash_profile and make sure to run source on the file:
export ANDROID_SDK_ROOT="$HOME/Library/Android/sdk"
export PATH="$PATH:$ANDROID_SDK_ROOT/platform-tools:$ANDROID_SDK_ROOT/emulator"
Setting Up an Android 15 Google Play AVD (API 35)
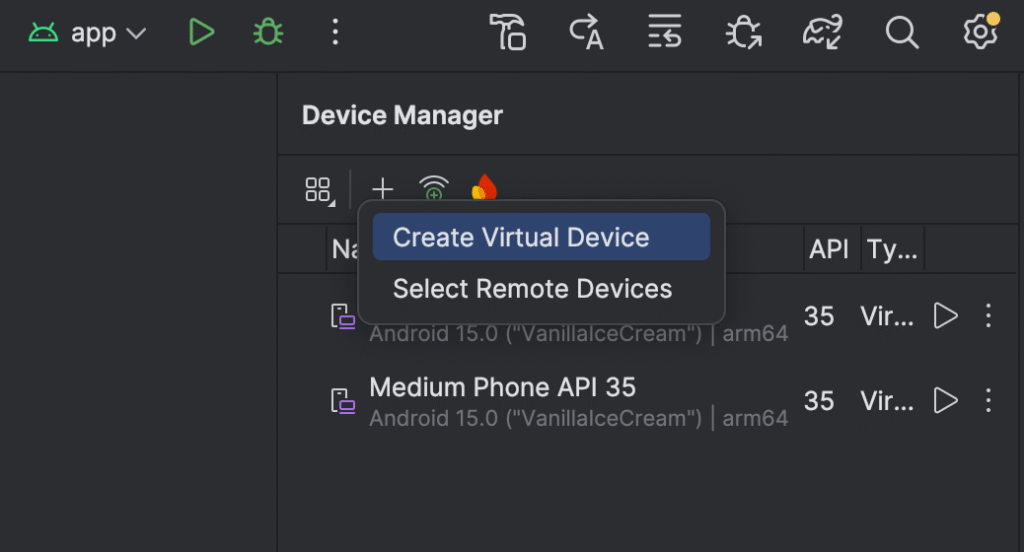
- Create a new AVD using Android Studio’s Device Manager:
In Android Studio, head over to Tools > Device Manager.
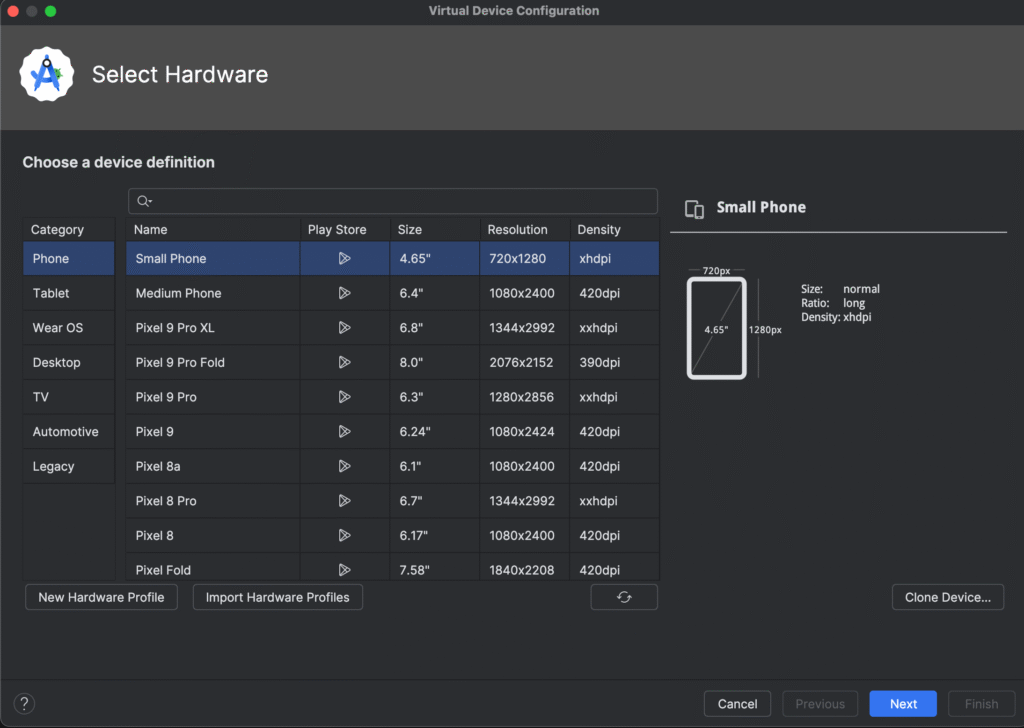
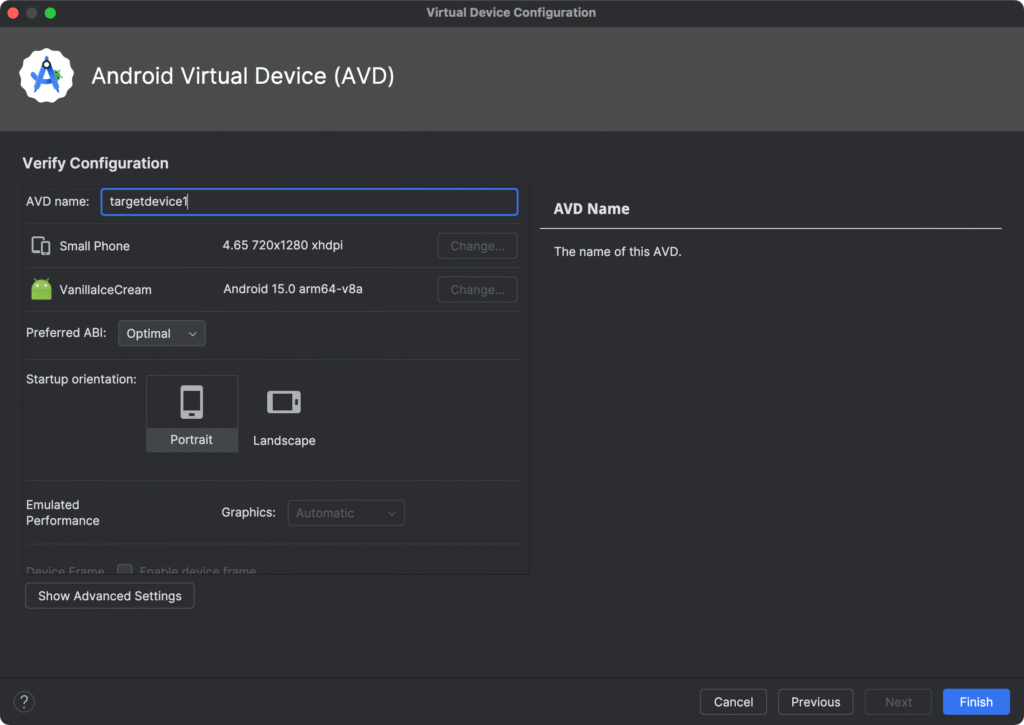
Click Create Device and select a device profile. In our case we’ll choose the “Small Phone” but feel free to choose any of the other skins you might want from the provided list.
In the system image selection, choose an Android 15 (API 35) image. As shown in the screenshot below, choose an image with Google APIs or Google Play Services support so that apps requiring Google Play will run.
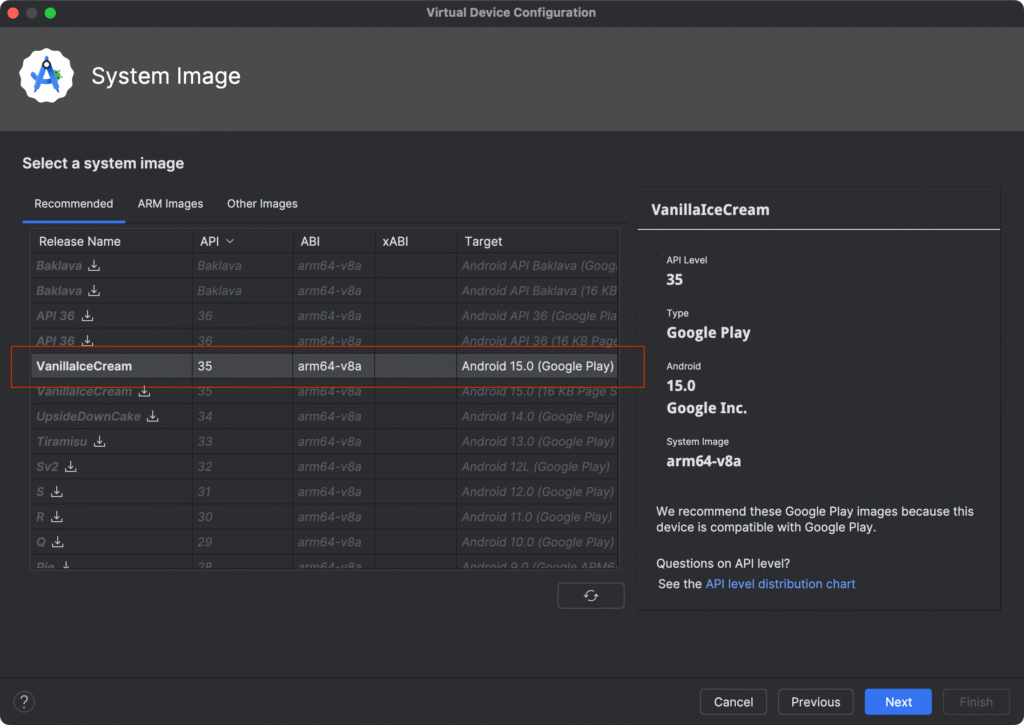
In our case, we chose API 35 with Google Play. Download the image if needed and finish creating the AVD. In our case we’ll save this AVD device with the name as targetdevice1.
Note: An important note here will be that if you are on an Apple Silicon Mac, use the ARM64-v8a image; on Intel/AMD, use an x86_64 image.
- Disable Snapshots for a Cold Boot:
By default, the emulator may use Quick Boot which is a saved state. We need a full cold boot to apply root changes and persist them. Open the AVD’s settings in Device Manager and turn off “Save to Quick Boot” (snapshots). Alternatively, you can perform a one-time cold boot by clicking the drop-down arrow next to the device’s Launch button and selecting the Cold Boot option. This is critical because if you boot from a saved snapshot, any rooting changes might be lost on the next start. This is because the AVD would potentially revert to its previous unrooted state. Ensure the AVD is configured to start from scratch so the root patch will stick.
- Launch the emulator (cold boot):
Start the AVD fresh. You can do this from Android Studio as shown above, or via command line:
# Replace targetdevice1 with your AVD name from `emulator -list-avds`
emulator -avd targetdevice1 -no-snapshot-load
This will launch the emulator without loading any snapshot, forcing a full boot. Wait for the Android home screen to appear.
- Verify the AVD is unrooted:
This is going to be a baseline check. Once the emulator is running, verify that it does not have root yet. In a terminal, run:
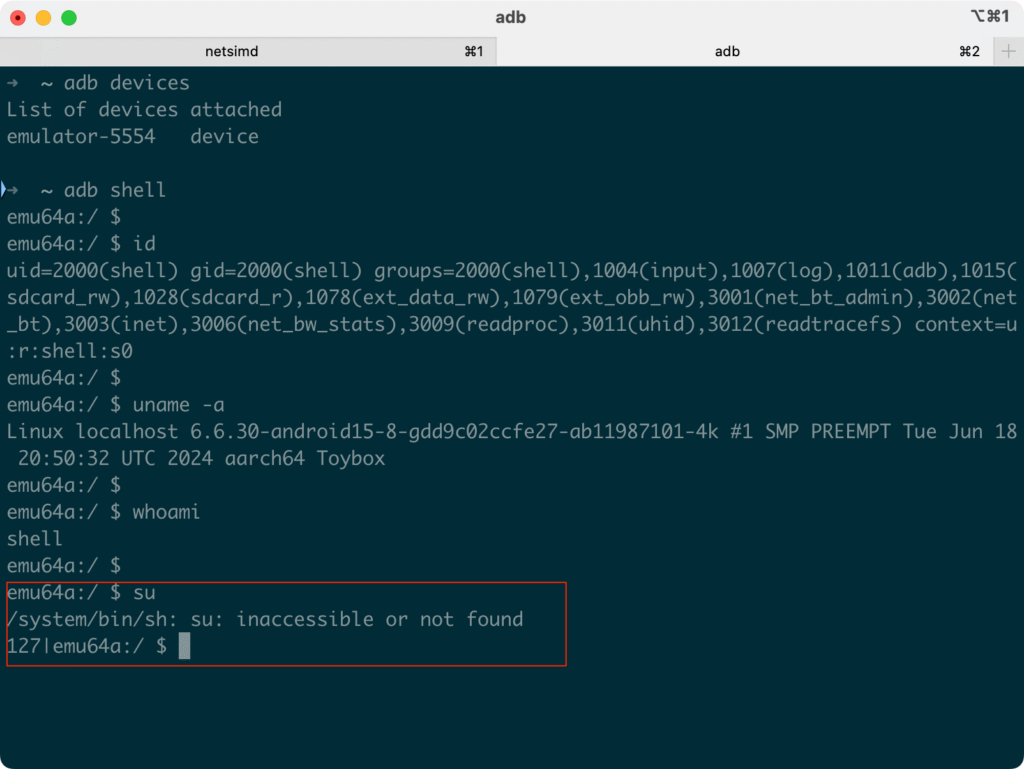
adb devices    # make sure your emulator is listed as "device"
adb shell      # open a shell on the device
$ whoami       # or id -un, should output "shell"
$ su
Since the emulator is not rooted at this point, running su should result in an error or “not found” message as shown in the following screenshot:
Rooting the Emulator with rootAVD
Now we will use the rootAVD utility to patch the emulator’s images with Magisk (the popular rooting solution) and achieve root access. The rootAVD script automates the process of injecting Magisk into the AVD’s boot image/ramdisk.
Here are the steps on how to go about rooting the emulator with rootAVD.
- Download and initialize rootAVD:
Clone the rootAVD repository from GitLab (open-source by NewBit):
git clone https://gitlab.com/newbit/rootAVD.git
cd rootAVD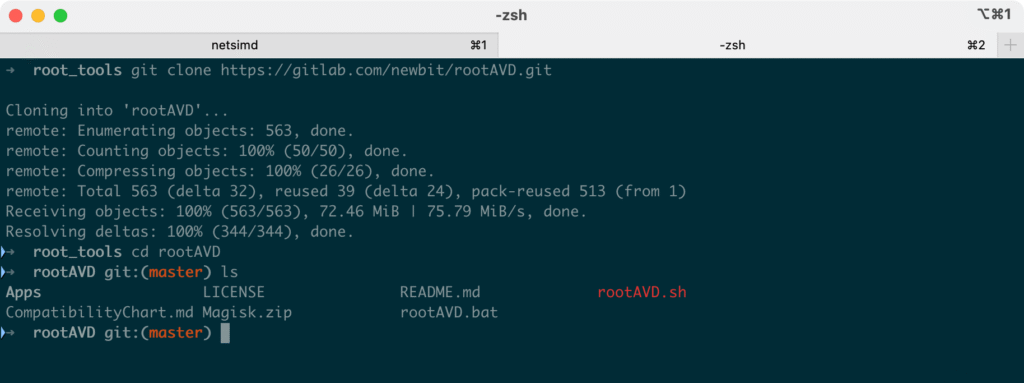
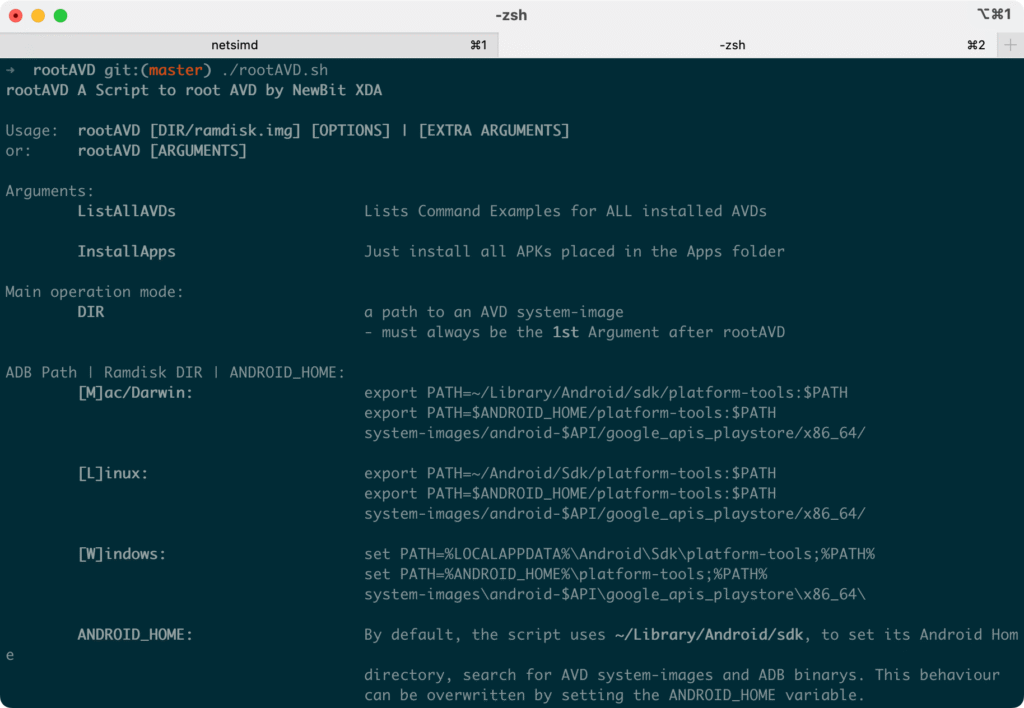
This repository contains a script rootAVD.sh. Run it once without arguments to ensure it’s executable:
./rootAVD.shYou should see usage information printed, confirming the tool is ready as shown in the following screenshot:
- List available AVD targets:
The tool can auto-detect installed AVD system images. Run the following command:
./rootAVD.sh ListAllAVDsThis will list command examples for all installed AVD images on your system. Look for the entry corresponding to the AVD you created (API 35). For instance, you might see output for API 35 such as:
./rootAVD.sh system-images/android-35/google_apis_playstore/arm64-v8a/ramdisk.img
./rootAVD.sh system-images/android-35/google_apis_playstore/arm64-v8a/ramdisk.img FAKEBOOTIMG
./rootAVD.sh system-images/android-35/google_apis_playstore/arm64-v8a/ramdisk.img restore
The first line is the basic command to root that AVD. The second line includes a FAKEBOOTIMG option — more on this later. The third line is for restoring the original images in case you need to undo the root. Make sure to copy the command that corresponds to your AVD’s ramdisk path.
- Start the rooting process:
Note that this script uses adb to communicate with the emulator. So make sure the emulator is still running, and execute the rootAVD command to patch the AVD. For example:
./rootAVD.sh system-images/android-35/google_apis_playstore/arm64-v8a/ramdisk.imgNote: Use the path from the ListAllAVDs output that matches your AVD. If your AVD uses a different API or ABI, the path will differ.
- Magisk version selection: During execution, rootAVD will check the emulator and prompt you to choose a Magisk version/channel if the AVD is online. You’ll typically see a menu like following:
[?] Choose a Magisk Version to install and make it local
[s] (s)how all available Magisk Versions
[1] local stable '26.4' (ENTER)
[2] stable 28.1
[3] canary 1e3edb88(28103)
If you don’t input anything, it usually defaults to the stable option after a short timeout. For most users, Stable is recommended. All you have to do is enter the number or simply press Enter to select stable.
In our case we chose to keep it the default by not making any entry. Continue to watch the script’s output. It will back up the original boot files creating .backup copies, then patch the ramdisk/kernel with Magisk. This involves downloading the Magisk zip if not already present and integrating it into the AVD’s images.
The script will begin patching the AVD’s ramdisk with Magisk.
- For the interested folks, here is the complete output of our command:
➜  rootAVD git:(master) ./rootAVD.sh system-images/android-35/google_apis_playstore/arm64-v8a/ramdisk.img
[!] and we are NOT in an emulator shell
[*] Set Directories
[-] source.properties file exists
[*] AVD system-image Pkg.Revision=9
[-] Test if ADB SHELL is working
[*] ADB connection possible
[-] In any AVD via ADB, you can execute code without root in /data/data/com.android.shell
[*] Cleaning up the ADB working space
[*] Creating the ADB working space
[-] Magisk installer Zip exists already
[*] Push Magisk.zip into /data/data/com.android.shell/Magisk
[*] create Backup File of ramdisk.img
[*] Push ramdisk.img into /data/data/com.android.shell/Magisk/ramdisk.img
[*] Push rootAVD.sh into /data/data/com.android.shell/Magisk
[-] run the actual Boot/Ramdisk/Kernel Image Patch Script
[*] from Magisk by topjohnwu and modded by NewBit XDA
[!] We are in a ranchu emulator shell
[-] Api Level Arch Detect
[-] Device Platform is arm64 only
[-] Device SDK API: 35
[-] First API Level: 35
[-] The AVD runs on Android 15
[-] Switch to the location of the script file
[*] Looking for an unzip binary
[-] unzip binary found
[*] Extracting busybox and Magisk.zip via unzip ...
[*] Finding a working Busybox Version
[*] Testing Busybox /data/data/com.android.shell/Magisk/lib/arm64-v8a/libbusybox.so
[!] Found a working Busybox Version
[!] BusyBox v1.36.1-Magisk (2023-09-02 05:30:11 PDT) multi-call binary.
[*] Move busybox from lib to workdir
[-] Checking AVD's Internet connection...
[!] AVD is online
[!] Checking available Magisk Versions
[?] Choose a Magisk Version to install and make it local
[s] (s)how all available Magisk Versions
[1] local stable '26.4' (ENTER)
[2] stable 28.1
[3] canary 1e3edb88(28103)
[-] You chose Magisk local stable Version '26.4'
[*] Re-Run rootAVD in Magisk Busybox STANDALONE (D)ASH
[-] We are now in Magisk Busybox STANDALONE (D)ASH
[*] rootAVD with Magisk '26.4' Installer
[-] Get Flags
[*] System-as-root, keep dm/avb-verity
[-] Encrypted data, keep forceencrypt
[*] RECOVERYMODE=false
[-] KEEPVERITY=true
[*] KEEPFORCEENCRYPT=true
[-] copy all arm64-v8a files from /data/data/com.android.shell/Magisk/lib/arm64-v8a to /data/data/com.android.shell/Magisk
[-] copy 'stub.apk' from /data/data/com.android.shell/Magisk/assets to /data/data/com.android.shell/Magisk
[*] Detecting ramdisk.img compression
[!] Ramdisk.img uses lz4_legacy compression
[-] taken from shakalaca's MagiskOnEmulator/process.sh
[*] executing ramdisk splitting / extraction / repacking
[-] API level greater than 30
[*] Check if we need to repack ramdisk before patching ..
[-] Multiple cpio archives detected
[*] Unpacking ramdisk ..
[*] Searching for the real End of the 1st Archive
[-] Dumping from 0 to 1706139 ..Detected format: [lz4_legacy]
[-] Dumping from 1706139 to 1802087 ..Detected format: [lz4_legacy]
[*] Repacking ramdisk ..
[!] allowing MANAGE_EXTERNAL_STORAGE permissions to...
[-] Checking ramdisk STATUS=0
[-] Stock boot image detected
[*] Verifying Boot Image by its Kernel Release number:
[-] This AVD = 6.6.30-android15-8-gdd9c02ccfe27-ab11987101-4k
[-] Ramdisk = 6.6.30-android15-8-gdd9c02ccfe27-ab11987101-4k
[!] Ramdisk is probably from this AVD
[-] Patching ramdisk
[*] Pre-init storage partition: vdd1
[!] stub.apk is present, compress and add it to ramdisk
[*] adding overlay.d/sbin folders to ramdisk
Loading cpio: [ramdisk.cpio]
Create directory [overlay.d] (0750)
Create directory [overlay.d/sbin] (0750)
Dumping cpio: [ramdisk.cpio]
[!] patching the ramdisk with Magisk Init
Loading cpio: [ramdisk.cpio]
Add file [init] (100750)
Add file [overlay.d/sbin/magisk64.xz] (100644)
Add file [overlay.d/sbin/stub.xz] (100644)
Patch with flag KEEPVERITY=[true] KEEPFORCEENCRYPT=[true]
Loading cpio: [ramdisk.cpio.orig]
Backup [init] → [.backup/init]
Record new entry: [overlay.d] → [.backup/.rmlist]
Record new entry: [overlay.d/sbin] → [.backup/.rmlist]
Record new entry: [overlay.d/sbin/magisk64.xz] → [.backup/.rmlist]
Record new entry: [overlay.d/sbin/stub.xz] → [.backup/.rmlist]
Create directory [.backup] (0000)
Add file [.backup/.magisk] (100000)
Dumping cpio: [ramdisk.cpio]
[*] repacking back to ramdisk.img format
[!] Rename Magisk.zip to Magisk.apk
[*] Pull ramdiskpatched4AVD.img into ramdisk.img
[*] Pull Magisk.apk into .
[*] Pull Magisk.zip into .
[-] Clean up the ADB working space
[-] Install all APKs placed in the Apps folder
[*] Trying to install Apps/Magisk.apk
[*] Performing Streamed Install
[*] Success
[-] Shut-Down & Reboot (Cold Boot Now) the AVD and see if it worked
[-] Root and Su with Magisk for Android Studio AVDs
[-] Trying to shut down the AVD
[!] If the AVD doesn't shut down, try it manually!
[-] Modded by NewBit XDA – Jan. 2021
[!] Huge Credits and big Thanks to topjohnwu, shakalaca, vvb2060 and HuskyDG
➜ rootAVD git:(master)- Special case — using FAKEBOOTIMG for newer AVDs:
For some recent Android versions (like API 34), the standard patch might report "Magisk Installed: N/A" or fail to inject properly. If the script output indicates Magisk wasn’t installed, you should rerun the command with the FAKEBOOTIMG option:
./rootAVD.sh system-images/android-35/default/arm64-v8a/ramdisk.img FAKEBOOTIMGThe FAKEBOOTIMG flag triggers a different approach for devices with new boot image formats. In this mode, rootAVD will create a fake boot image and ask you to manually patch it using the Magisk app:
-
The script will push a file (e.g.
fakeboot.img) into the emulator’s/sdcard/Downloaddirectory. -
It will then display a message like “Install/Patch /sdcard/Download/fakeboot.img and hit Enter when done”. At this point, do not press Enter yet. Instead, go to the emulator, launch the Magisk app, and use the Install -> Select and Patch a File option. Navigate to
/sdcard/Download/and selectfakeboot.img. Magisk will patch the image and output a modified file. Usually it says “Output file is …”. Once Magisk finishes, return to the terminal and press Enter to let rootAVD continue. -
The script will then finish the installation, replace the AVD’s ramdisk with the patched version, and automatically reboot the emulator to apply changes. You should see a success message indicating Magisk is installed.
Important thing to note here is that if your AVD patched successfully on the first try (Magisk installed without needing the above manual step), you can skip the fake boot image process. The script’s output will clearly indicate if it needed manual intervention or not.
- Emulator restarting and reboots:
Once the rooting script completes, the emulator may shut down on its own (especially if the patch was applied without fakeboot method). If it doesn’t automatically reboot, you should close and relaunch the AVD now. Always do a cold boot when launching to ensure the updated images load.
In our case the device did not automatically boot up after the restart. So, I’ll head back to the terminal and launch the emulator again using the emulator command:
emulator -avd targetdevice1 -no-snapshot-loadAfter the patched AVD boots up, you should find that the device is now rooted with Magisk.
Post-Root Validation (Magisk Setup & Verification)
After your emulator boots up with the patched images, we need to verify that root access is working and finalize the Magisk setup. Here is the step-by-step process on how to do that:
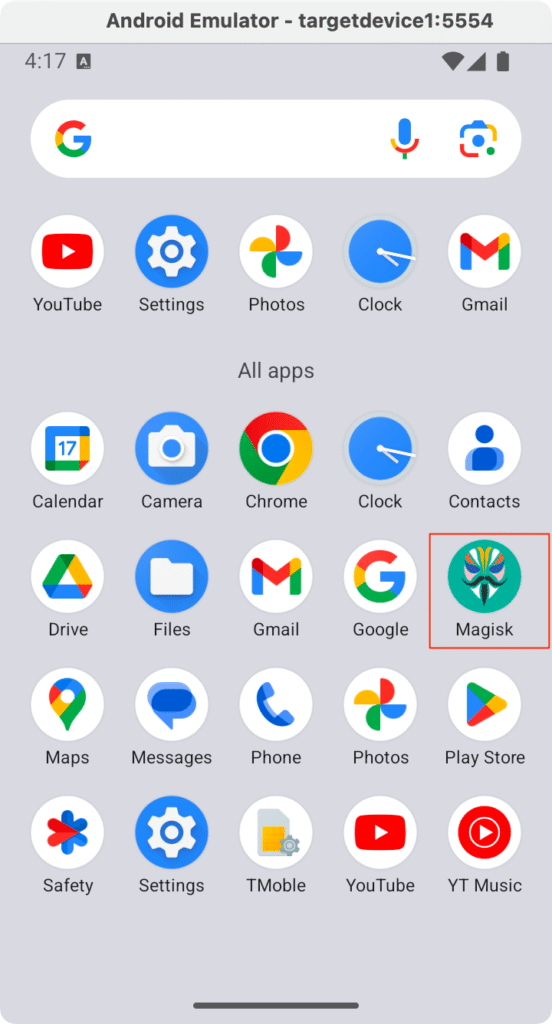
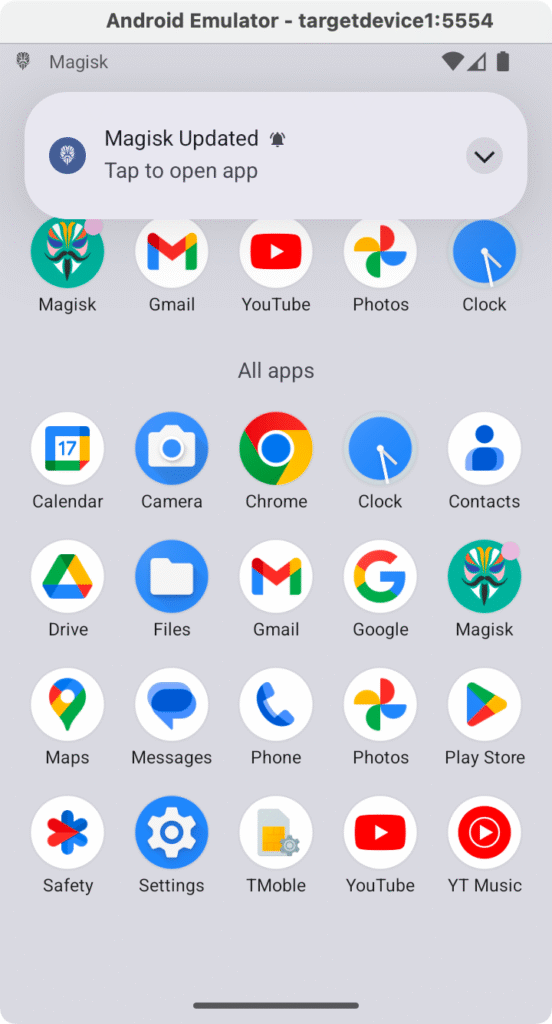
- Check for Magisk app: The Magisk app should now be installed on the virtual device. You can confirm this by looking for the Magisk icon in the menu, as shown in the following screenshot:
- Open the Magisk app: It may show a dialog or a banner indicating that additional setup is required. This happens on the first install of Magisk in many cases. For example, it might say “Requires Additional Setup” with a “Let’s go” or “Direct Install” option. This is normal. As shown in the following screenshot, we also see the “Requires Additional Setup” prompt:
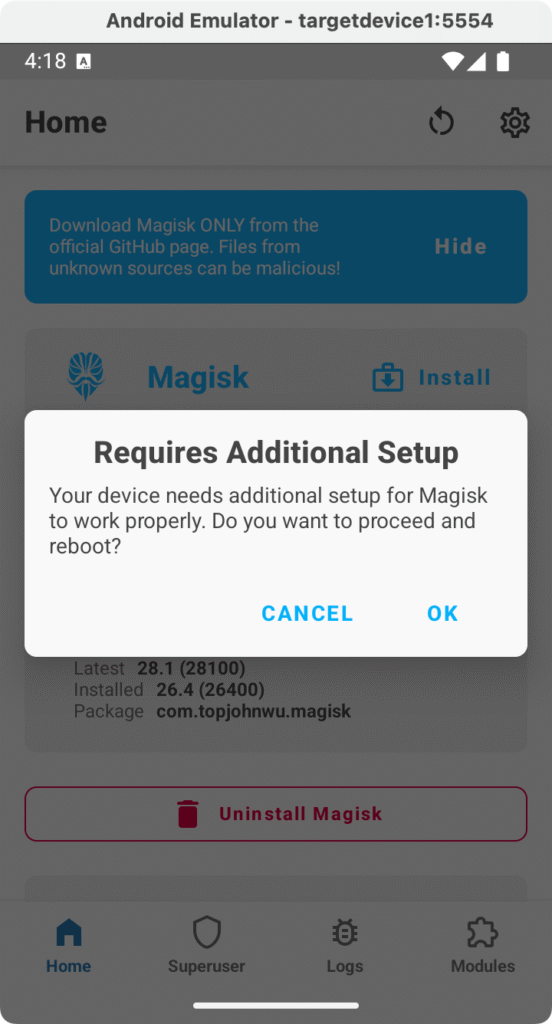
We’ll click “OK” and continue. This will reboot the device to proceed with the setup.
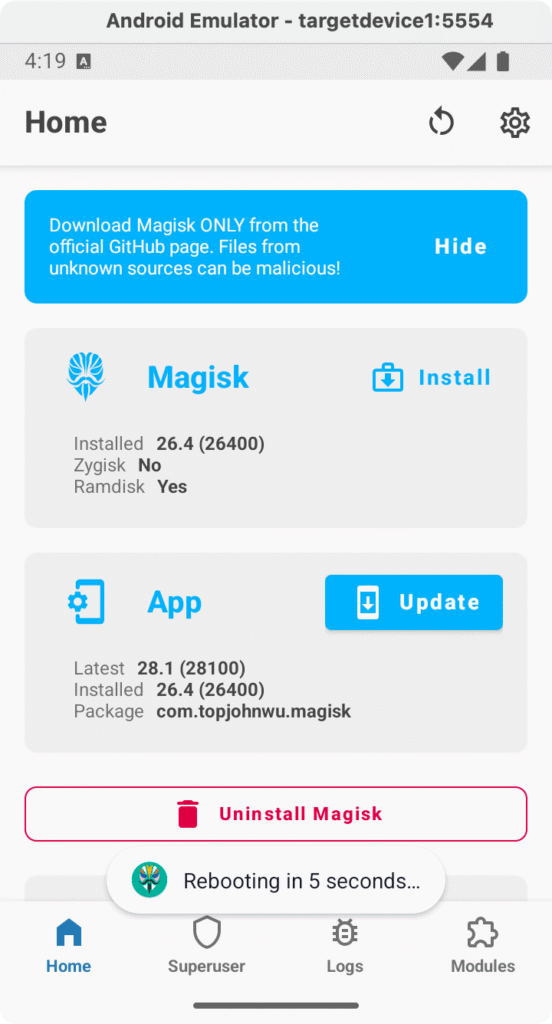
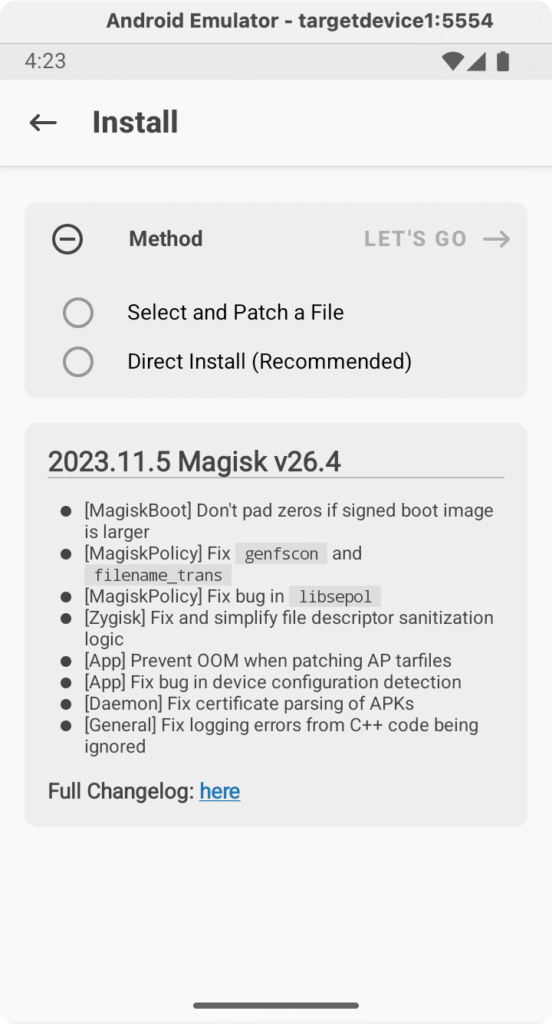
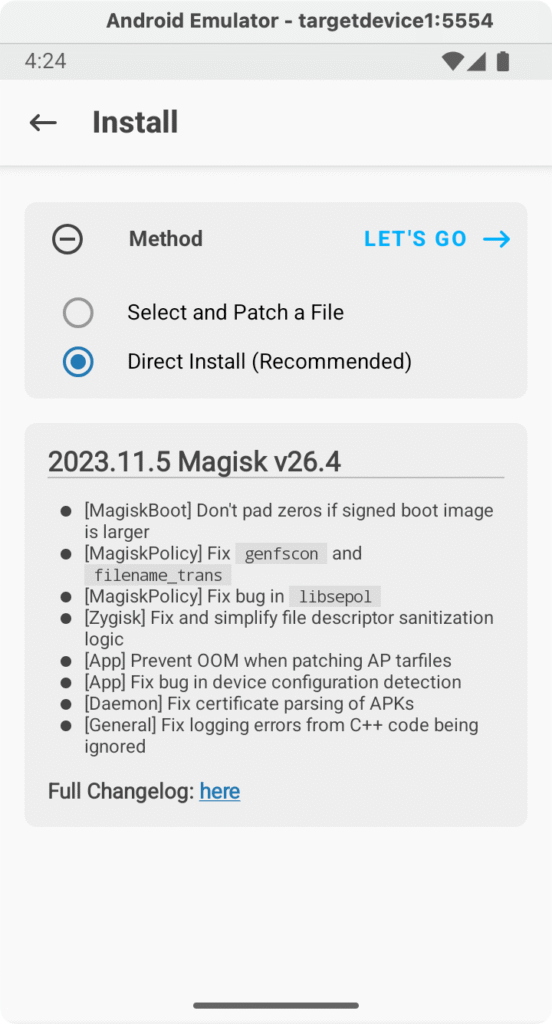
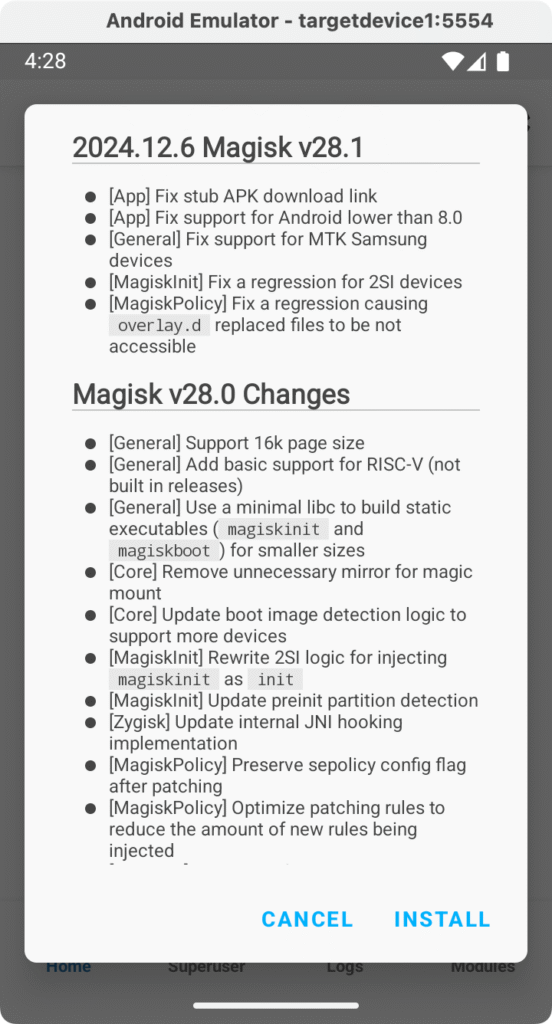
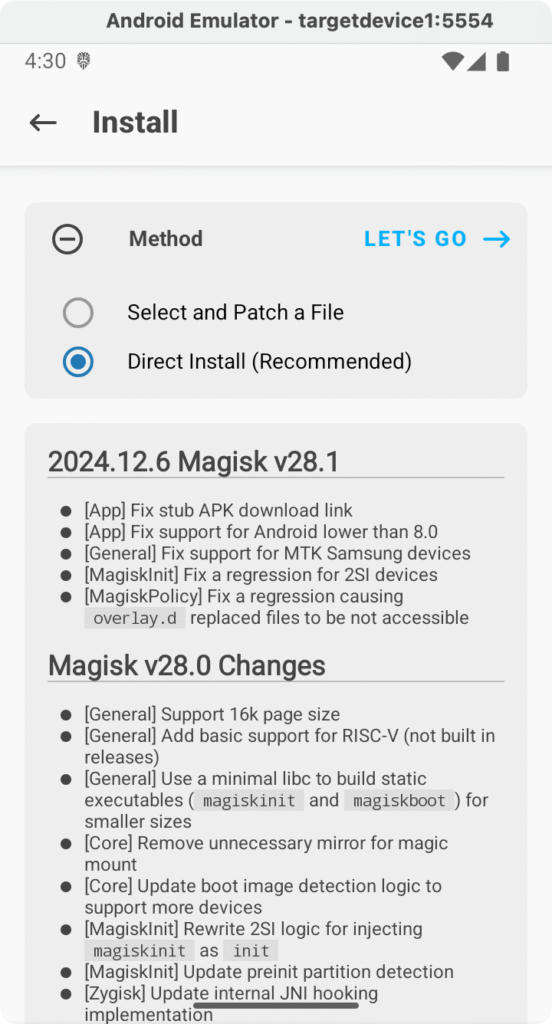
- Update/Complete Magisk installation: In the Magisk app, if an Update is recommended or if the app indicates that it needs to install the full version:

Tap Install, which is usually a button next to the Magisk version. Choose Direct Install (Recommended) as the method to install Magisk into the current boot image. Confirm and wait for it to patch the image.
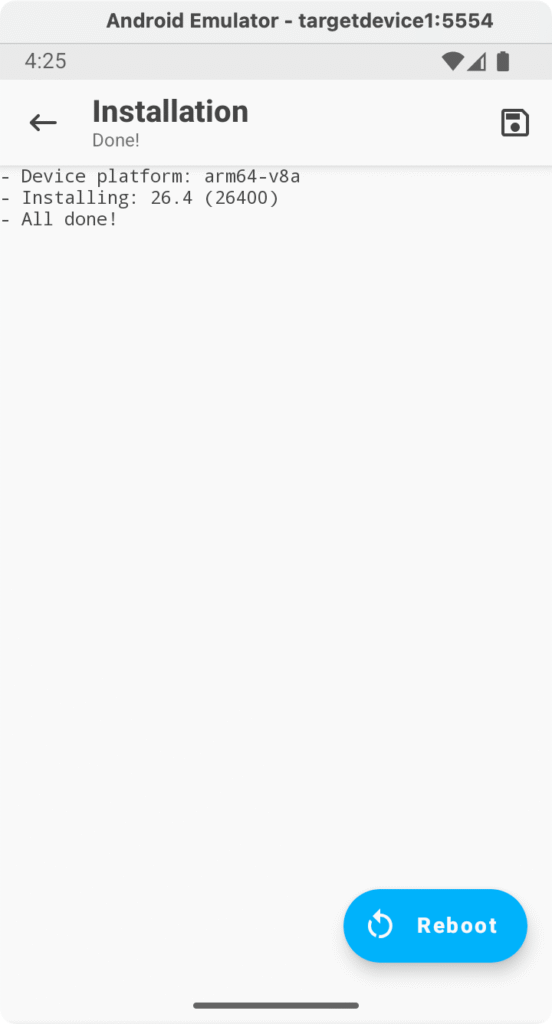
Once it says All done! or prompts to reboot, go ahead and reboot the emulator. You can click Reboot, use adb reboot, or simply close and cold boot it again. This step ensures Magisk is fully integrated.
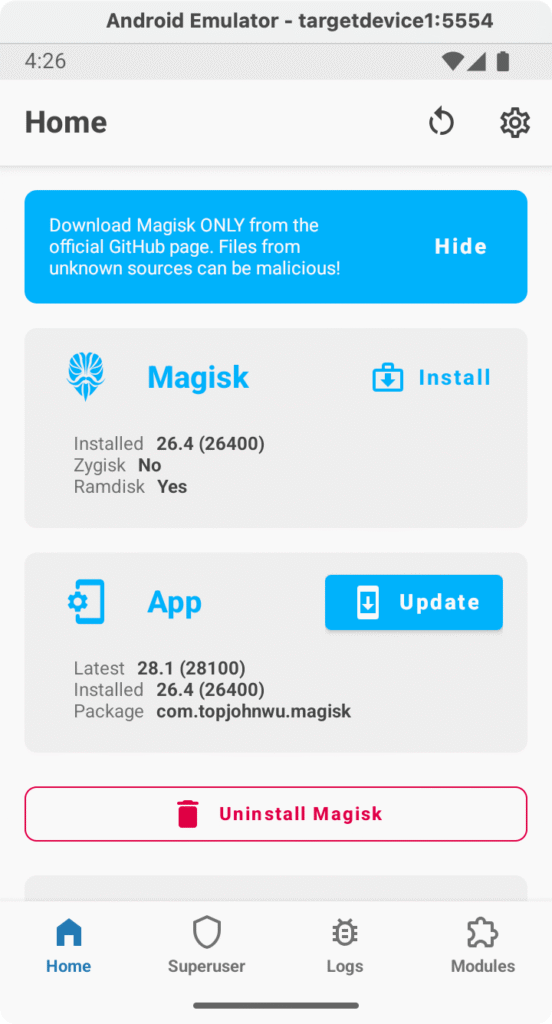
- Verify Magisk status: After reboot, re-open the Magisk app. It should show that Magisk is up to date. If you still see the “Update” button, go ahead and click it.
Once updated, you should receive a notification about the application completing the update.
- Final update check: In our case, it looks like there is one more update available. Let’s perform the update as before:
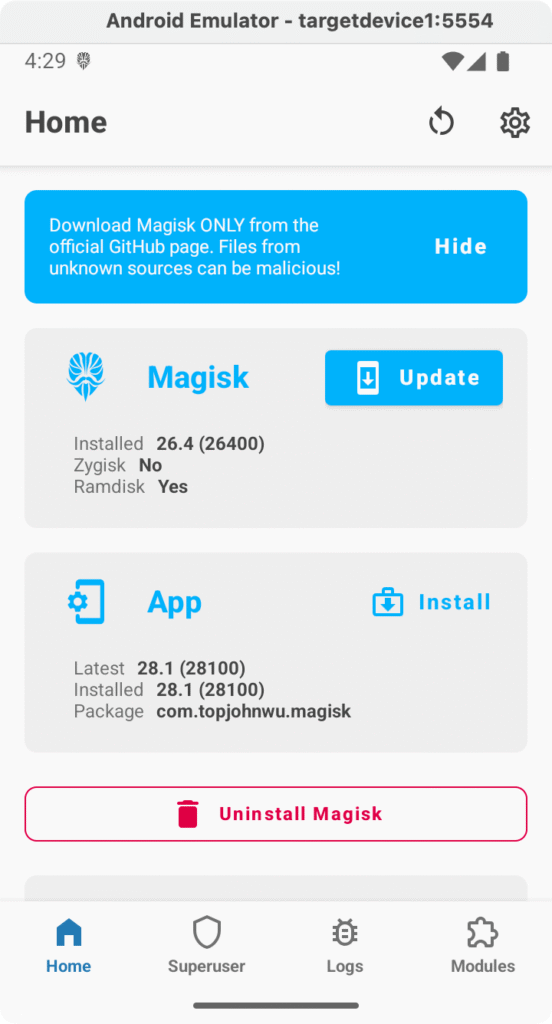
Select Direct Install and complete the update just like before.
The following screenshot shows that the update was successful:

- Verify root access via ADB:
Now we perform a final check from the host machine:
adb shell        # open a shell on the emulator
$ su
This time, when you enter su, you should see a prompt on the emulator screen from Magisk asking to grant superuser rights to the shell as shown in the following screenshot.
Approve the request by clicking grant. The shell prompt should change from $ to #, indicating you have root privileges. You can run id to confirm, and access sandbox locations.
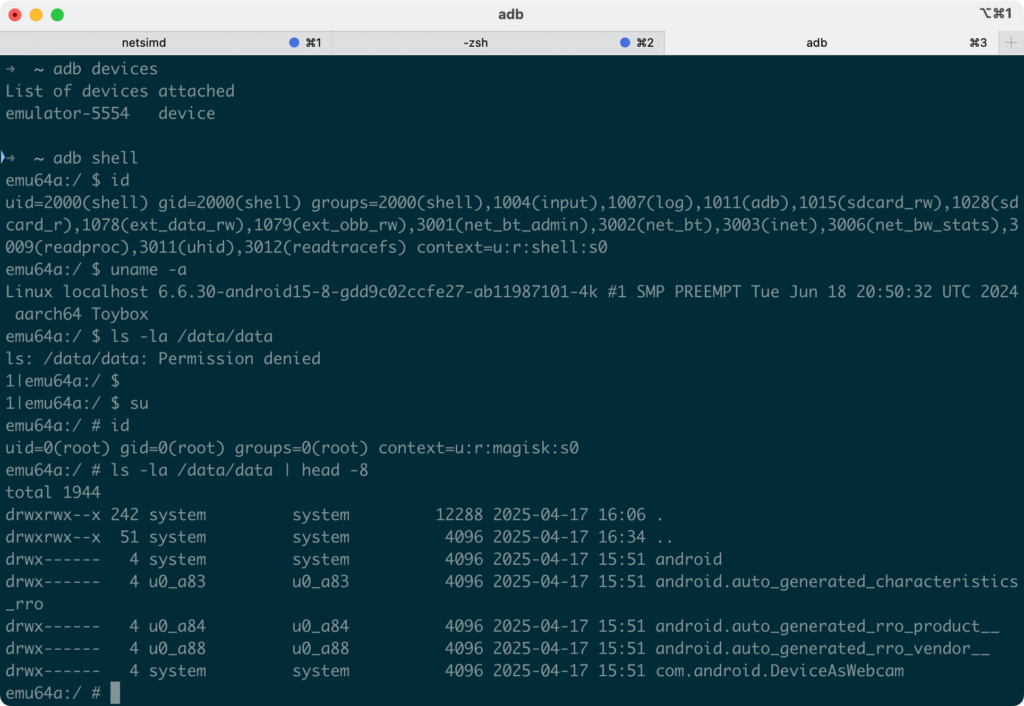
The uid=0(root) in the output confirms the shell is running as root. Congratulations! Your AVD is now fully rooted! You’ll still not be able to use the adb root command, but that is fine, as the command adb shell su will help you land into a root shell.
Here is a Tip. You might want to go into the Magisk app’s settings and enable Zygisk if you plan to use Magisk modules for hiding root, etc. and then reboot again. Also, you can toggle Magisk Hide (DenyList) and add apps to the denylist if you want to conceal root from specific apps for testing root detection bypasses.
Using the Rooted Emulator: FridaLoader Example
With a rooted emulator, you can now run apps and tools that require root access. Let’s walk through a real-world use case: using Frida, a popular dynamic instrumentation toolkit. We’ll use an app called FridaLoader to demonstrate this.
FridaLoader is an Android app that can download and launch the latest Frida server on your device. However, it requires root access because it installs the Frida server binary in the system and needs appropriate permissions to run the server. On a standard unrooted emulator, FridaLoader will not work at all and will crash. Now that our emulator is rooted with Magisk, we can use FridaLoader.
- Install FridaLoader: Download the FridaLoader APK from its GitHub releases. For example:
wget https://github.com/dineshshetty/FridaLoader/releases/download/v4/FridaLoader.apk
adb install -r -g FridaLoader.apk
Alternatively, you can clone the project and build it, but grabbing the pre-built APK is faster. After installation, launch the FridaLoader app on the emulator.
- Grant root permissions: On first launch, FridaLoader will request Superuser permission. A Magisk dialog should appear — go ahead and grant it root access. It may also ask you to grant
adb shellroot access the first time; we already did that during root verification, so it’s already handled.
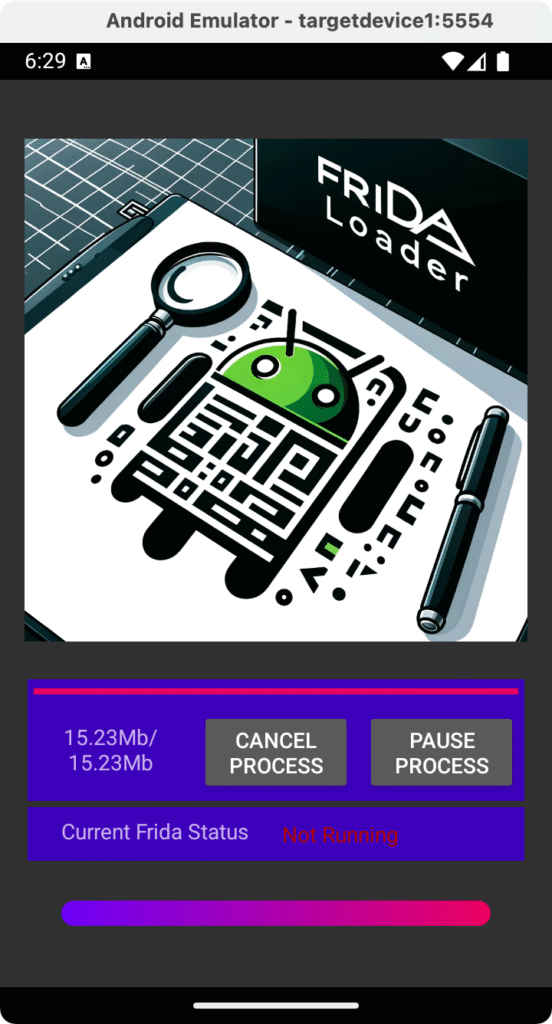
- Use FridaLoader to start Frida server: FridaLoader needs to download the correct Frida server binary for the device’s architecture, so ensure the emulator has internet access. Follow the in-app instructions to download and start Frida. FridaLoader will automatically fetch the appropriate
frida-serverfor Android 15 (and the emulator’s CPU architecture, which in our case isarm64) and launch it. You should see a confirmation or status message in the app indicating that the Frida server is running.
At this point, you have the Frida server running on the emulator with root privileges. For example, you can test it by running a Frida command on your host machine if you have Frida CLI installed.
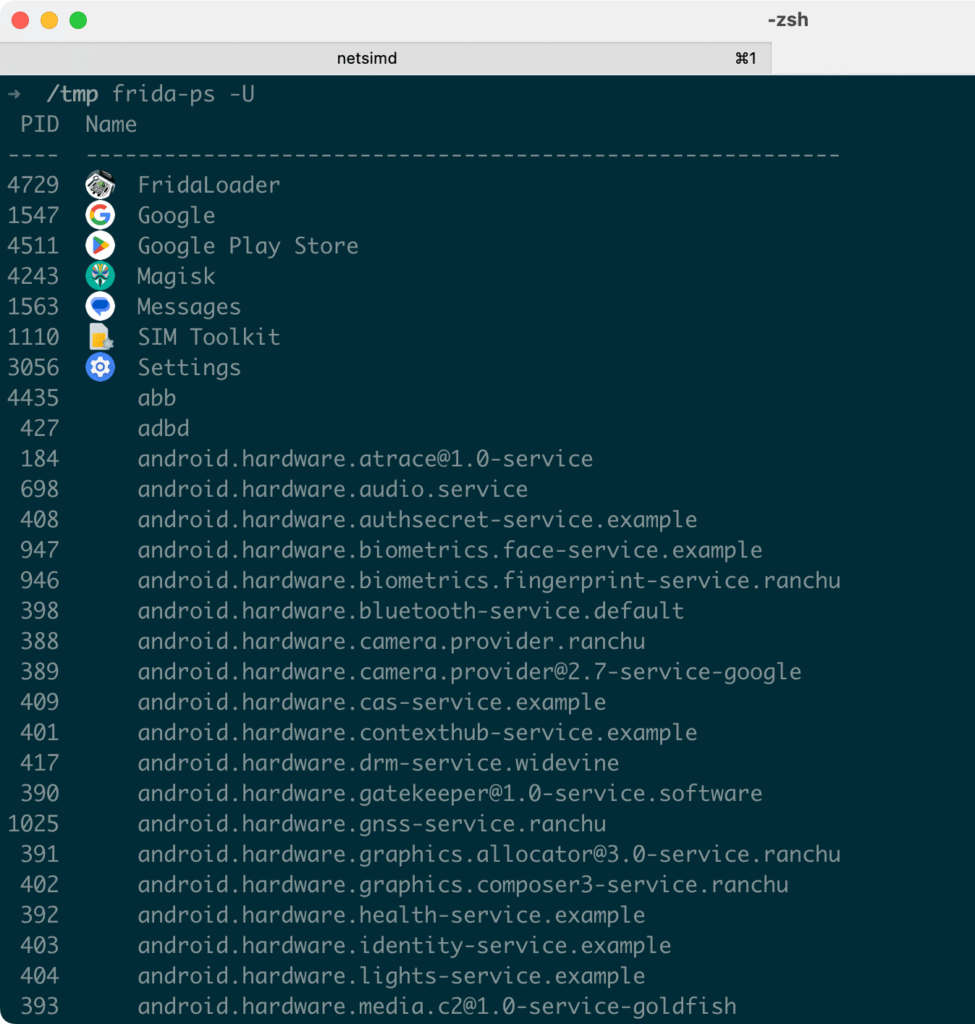
This confirms that an app requiring root functions properly on the rooted AVD, whereas it would fail on an unrooted one. The ability to run tools like this opens up possibilities for instrumenting apps, exploring internals, and performing runtime security tests that are not possible on unrooted devices.
Troubleshooting Common Issues
Even with careful steps, you might encounter some hiccups. Here are some common issues and their solutions:
-
adboremulatornot found (command not found): This indicates your PATH is not set up correctly. Make sure you added the SDKplatform-toolsandemulatordirectories to your PATH for your shell and that you restarted the terminal (see prerequisites). You can also invoke them by full path (e.g.~/Library/Android/sdk/platform-tools/adb) if needed. -
AVD does not appear in
ListAllAVDsoutput: rootAVD by default searches the standard SDK location ($ANDROID_SDK_ROOTor~/Library/Android/sdkon Mac) for system images. If your SDK is in a custom location, ensure theANDROID_SDK_ROOTenvironment variable is set accordingly before running the script. Alternatively, you may specify the path to the ramdisk manually if you know it. -
$ sunot working: If after booting your emulator you still get this message, it means the device is not rooted yet. Either the patch failed or you accidentally booted from a snapshot (undoing the root). Make sure to cold boot the emulator after patching. If the patch didn’t take, try theFAKEBOOTIMGmethod as described, or ensure you selected the correct AVD image to patch. -
Emulator reverts to unrooted state on restart: This is almost always due to the snapshot/quick-boot feature. You must disable snapshots before rooting, or at least always cold boot. If you root and then later start the emulator with a saved snapshot, it will load the old state with no Magisk. To fix this, either disable snapshots and re-root, or use AVD Manager’s Wipe Data and then reapply rootAVD.
-
Magisk “additional setup” loop: If the Magisk app keeps asking for “additional setup” every time or doesn’t seem to stick, make sure you performed the direct install and rebooted the emulator. Also, check that you’re not inadvertently reverting to a pre-root snapshot (see above issue). In some cases, using the Canary version of Magisk via rootAVD can help if the stable version has issues with a very new Android release, so you can try choosing the Canary option during the rootAVD Magisk selection.
-
Emulator won’t boot or crashes after patch: If the emulator refuses to boot, gets stuck, or closes after applying rootAVD, something may have gone wrong with the patch. Don’t panic! rootAVD created backups of the original boot images (ramdisk and kernel). You can restore them easily. For example, run the
restorecommand that was shown byListAllAVDs:
./rootAVD.sh system-images/android-35/google_apis_playstore/arm64-v8a/ramdisk.img restoreThis will put back the original ramdisk and kernel, essentially un-rooting the AVD to its original state. You can then try the process again. Ensure you use the correct options (for instance, the FAKEBOOTIMG method if standard patching failed) and that your Magisk app in the emulator is up-to-date.
-
Error: emulator binary not found by rootAVD: On macOS, the Android emulator binary might not be in the default
$PATHthat the script expects. We set up the PATH in prerequisites, but if you still get an error, you can edit therootAVD.shscript to point to your emulator’s path or launch the emulator manually. Generally, having the emulator running so thatadbcan talk to it is enough, since rootAVD mainly usesadbfor communication. -
Magisk app not installed after patch: If you don’t see the Magisk app on the emulator after running rootAVD, you can install it manually. Sometimes the script relies on an existing Magisk app or a standard path. Download the latest Magisk APK from the official GitHub releases for Magisk and install it on the emulator (
adb install Magisk-vXX.apk). The installed Magisk app should recognize that the device is rooted showing the installed Magisk version. If not, it means the root injection didn’t succeed. -
Networking issues or Magisk download failing: The script downloads Magisk from the internet. If you have a shaky connection or a firewall, it might fail to fetch the files. You can pre-download the Magisk ZIP and place it in the rootAVD directory, or the location it expects to avoid this. Check the script output for URLs if needed, or use the local option if available to use an already downloaded Magisk zip.
If you encounter other issues, check the rootAVD GitLab repository for documentation or raised issues. The community might have workarounds for specific edge cases. As a last resort, consider using an older API level image (e.g. API 33) which might be more straightforward to root, or use an alternative approach like a pre-rooted emulator image. But in most cases, rootAVD should handle the process with the steps we outlined!
Conclusion
In this post, we demonstrated how to root an Android emulator using the rootAVD tool and Magisk, turning a standard AVD into a powerful rooted device for testing. We covered the entire process: from setting up an AVD with Android 15, configuring your environment, applying the rootAVD patch, to validating root access and using it in a real scenario of running Frida for instrumentation. A rooted emulator provides immense benefits for mobile app testing and research — it lets you run penetration testing frameworks, inspect application behavior at the system level, bypass platform detection to understand how apps secure themselves, and perform dynamic analysis that would otherwise require a rooted physical device. All of this can be done without the risk of bricking a personal phone or the need to acquire dedicated test devices.
Keep in mind that while our emulator now behaves like a rooted device, you should still be aware of differences between emulators and real hardware like timing, sensors, etc when conducting your tests. Nonetheless, this setup is a huge boon for mobile security researchers and Android developers focused on security.
For further learning, including advanced techniques in Android application security and instrumentation, check out our 8kSec Academy course offerings where we provide in-depth training on Android internals as well as topics like Frida, root detection bypass, and more. Come check us out at https://academy.8ksec.io for details.
Happy rooting and safe hacking!
Explore Our On-Demand Courses
If you’re interested in diving deeper into topics like OS Internals, Kernel analysis, vulnerability research, and low-level system debugging, 8ksec Academy offers a wide range of on-demand courses tailored for security professionals and enthusiasts.
Visit academy.8ksec.io to explore our full catalog of courses. Whether you’re a beginner or an experienced professional, you’ll find resources to enhance your skills and stay ahead in the fast-evolving field of Mobile Security.
Feel free to reach out to us at support@ to ask any questions related to our blogs or any future blogs that you would like to see.
Have a great day!
Get in Touch
Want to learn these techniques hands-on, or need help assessing your own mobile or AI stack? We run live and on-demand trainings, offer mobile-security certifications, and take on penetration-testing engagements. Pick the door that fits.
We respond within one business day. Visit our events page to see where we'll be next.