Advanced Frida Usage Part 2 - Analyzing Signal and Telegram messages on iOS
All parts in this series
- 1 Advanced Frida Usage Part 1 - iOS Encryption Libraries | 8kSec Blogs
- 2 Advanced Frida Usage Part 2 - Analyzing Signal and Telegram messages on iOS
- 3 Advanced Frida Usage Part 3 - Inspecting XPC Calls
- 4 Advanced Frida Usage Part 4 - Sniffing location data from locationd in iOS
- 6 Advanced Frida Usage Part 6 - Utilizing writers
- 7 Advanced Frida Usage Part 7 - Frida Memory Operations
- 8 Frida Advanced Usage Part 8 - Frida Memory Operations Continued
- 9 Advanced Frida Usage Part 9 - Memory Scanning in Android
- 10 Advanced Frida Usage Part 10 - Instruction Tracing using Frida Stalker
Introduction
In this blog post, we will explore the message objects in two popular chat applications: Signal and Telegram. We’ll take similar technical approaches to analyze them, and also learn how to inspect Swift strings, which differ from typical object types.
Get ready for a straightforward yet insightful exploration into the world of chat application components.
The steps that we will take are:
-
Run
frida-traceto try to find interesting methods/functions -
After we identified the potential methods/functions we will inspects their arguments
-
We will try to make the sense of the data
-
Write a Frida script for it
-
Test to see that the script works correctly
Signal
Tracing
The first thing that we want to do is use the app and trace the methods/functions that are called using frida-trace tool. First, let’s try to find all the ObjC classes that contain message inside of them.
To filter on the ObjC methods we can use -m flag.
After running frida-trace we can see that we have no methods that match our criteria *[message *].
Once we change our criteria to match *[*Message* *] we can see that we have started tracing 19224 functions. We can also see that we are getting a lot of these copyWithZone so we will exclude those. We can exclude ObjC methods using -M flag.
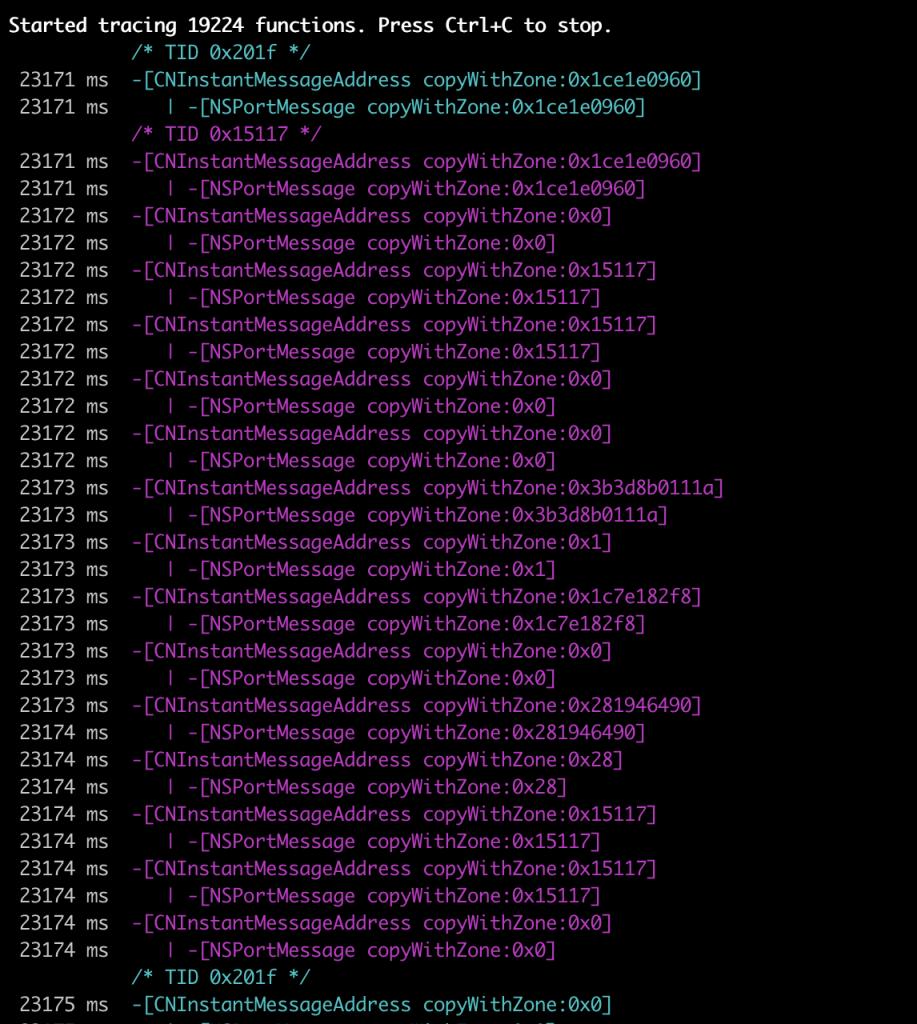
Our final command is:
frida-trace -U Signal -m “[Message ]” -M ”[ copyWithZone:]”
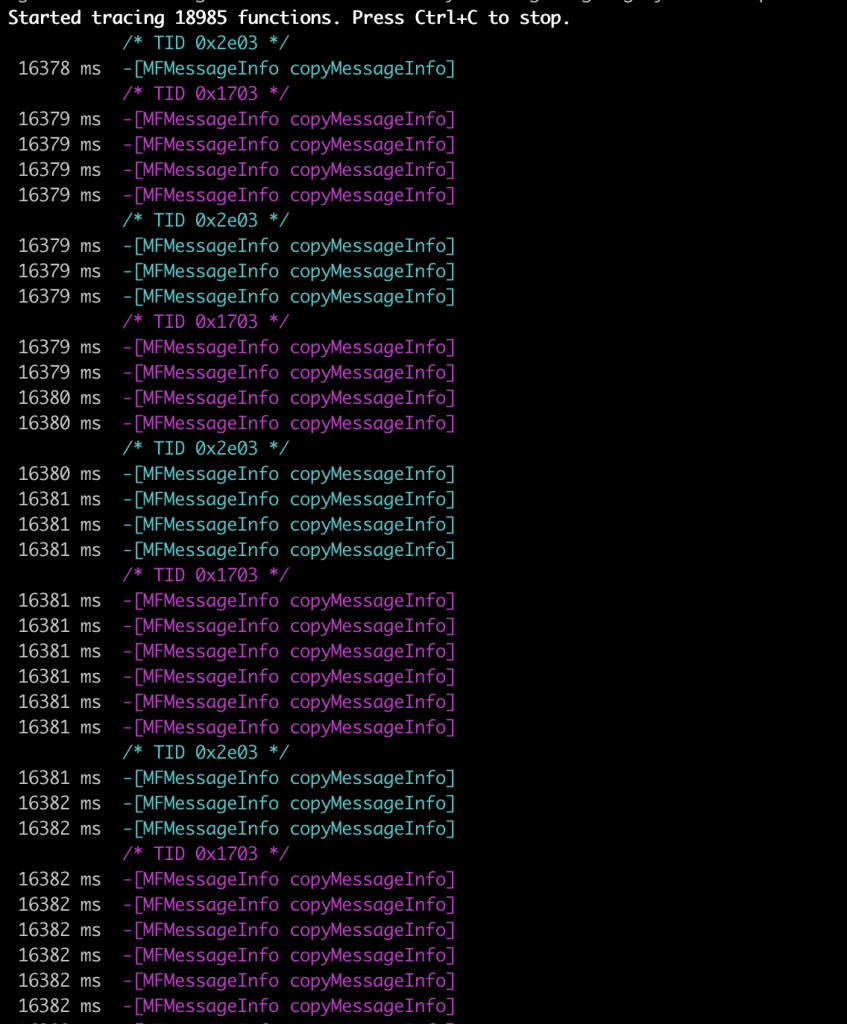
Once the chat is open and we receive the message, we can see a bunch of these -[MFMessageInfo copyMessageInfo] calls being made. Let’s now quickly analyze this class to see whether we have anything interesting in there.
To examine it, we will create a new object of MFMessageInfo class and we will examine its own methods (not the ones from parent class).
To create a new object of this class, we will call
[[MFMessageInfo alloc] init].
In Frida, this is equivalent to the
ObjC.classes.MSFMessageInfo.alloc().init().Once we have the ObjC object, we can examine its own methods using $ownMethods attribute which is exposed by Frida.
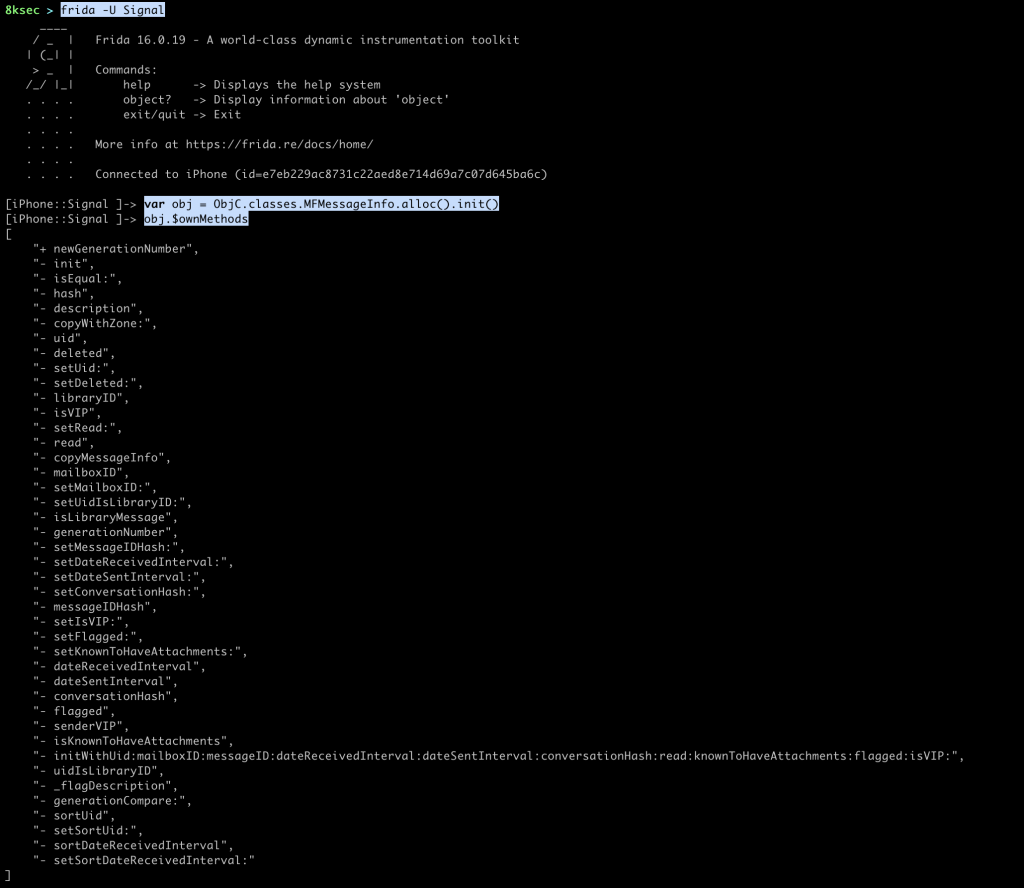
After taking a look at this, we can see that it has a bunch of interesting methods but not the raw message content. So, let’s exclude this method as well. The frida-trace command now looks like this:
frida-trace -U Signal -m “[Message ]” -M ”[ copyWithZone:]” -M ”-[MFMessageInfo copyMessageInfo]”
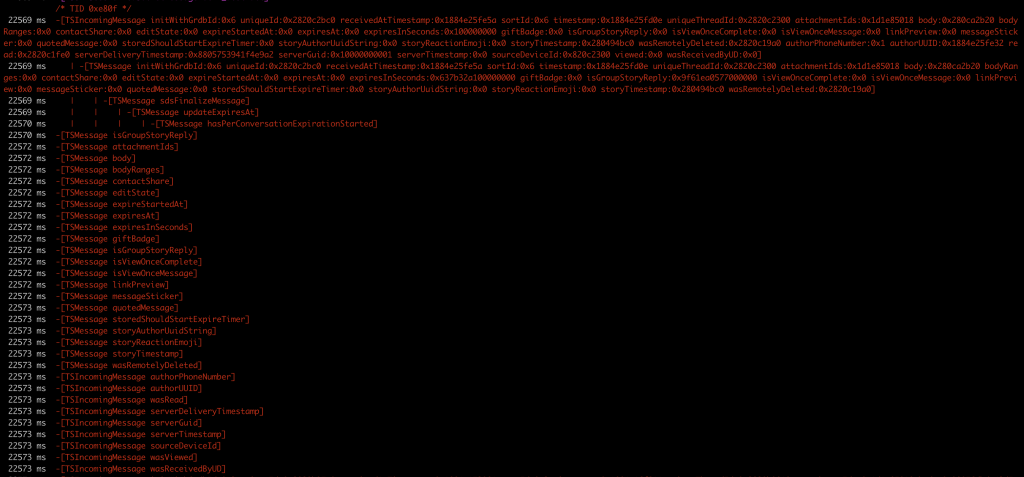
After we have excluded -[MFMessageInfo copyMessageInfo] we can see that we are getting some TSMessage class methods being called and we can see that we have body inside of it, which looks promising.
Inspecting arguments
Before we try to inspect the argument let’s talk briefly about how are methods actually called in ObjC.
objc_msgSend
Every method call, for example [SomeClass methodName] is actually called objc_msgSend function provided to us by ObjC runtime.
objc_msgSend accepts 3 arguments:
- pointer to object
- selector (
SEL) or method name which is basicallyconst char[] - arguments to pass to the method
Our [SomeClass methodName] looks something like:
objc_msgSend(SomeClass, methodName)
If the method accepts some arguments, lets say [SomeClass hello:@"8ksec"], this would look like objc_msgSend(SomeClass, hello, “8ksec”)
So, when we are intercepting ObjC methods using Frida, we are actually intercepting on these objc_msgSend calls.By knowing that information we can conclude the following:
args[0]is a objectargs[1]is a SEL or method nameargs[2:]are the arguments passed to the method
Writing Frida Script
After we have quickly described objc_msgSend, our script should to the following:
- Intercept on
[TSMessage body] - Write
args[0]to confirm that we are working indeed withTSMessage - Write
args[1]to confirm that we are working indeed withbodyselector - Examine its return value
One thing to keep in mind is that if we know that the pointer points to ObjC object, we can cast it to ObjC object by using ObjC.Object functionality inside the Frida. That way we can access its ivars (instance variables) and call methods.
let messageBody = ObjC.classes.TSMessage["- body"].implementation;
Interceptor.attach(messageBody, {
    onEnter(args) {
        // convert to ObjC.Object
        var obj = ObjC.Object(args[0]);
        // gets its name
        var objName = obj.$className;
        // since selector is const char[], we can read it using
        // Memory.readUtf8String
        var sel = Memory.readUtf8String(args[1]);
        console.log(`-[${objName} ${sel}]`);
    },
    onLeave(retval) {
        // convert return value from the method to ObjC.Object
        var body = ObjC.Object(retval);
        console.log(`body: ${body}`);
    }
});
Running the Frida Script
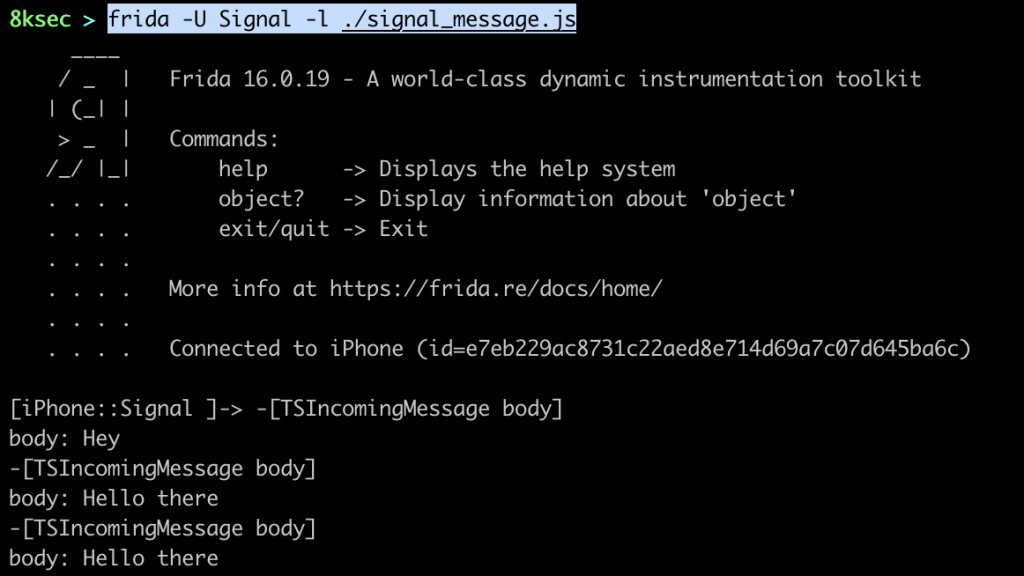
Output of the Frida script:
Inside Signal application:
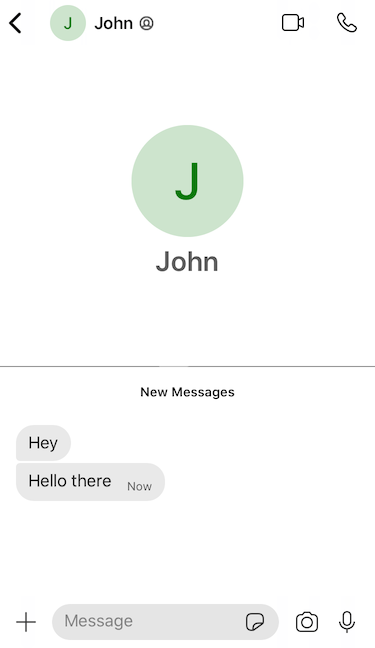
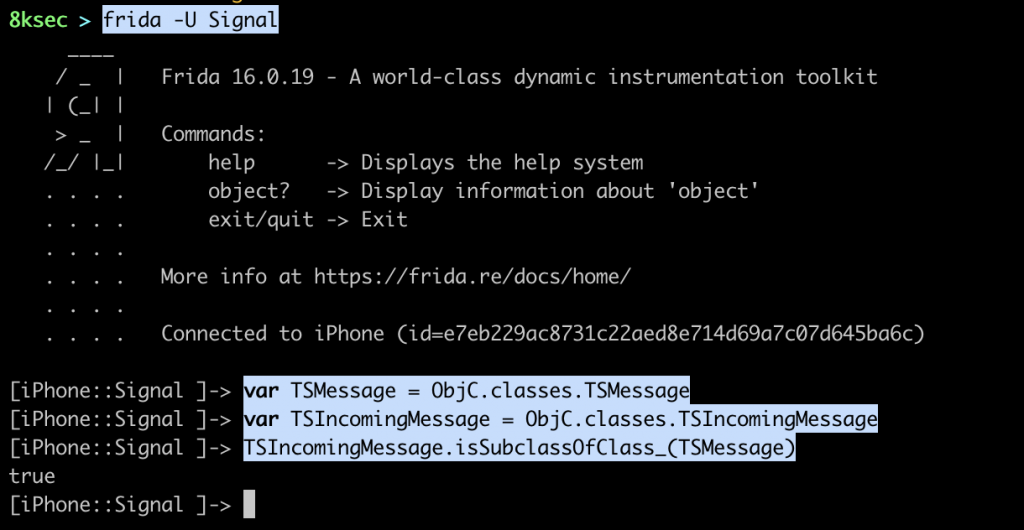
One thing you may notice is that we are getting hits for -[TSIncomingMessage body] instead of -[TSMessage body]. The reason for that is because TSIncomingMessage is a subclass of TSMessage and we can confirm that using Frida.
Telegram
Tracing
Just like we did with the Signal application, we will first start with tracing functions, but this time we will use -i to trace functions instead of methods.
Running frida-trace -U Telegram -i “*message*” gives us:
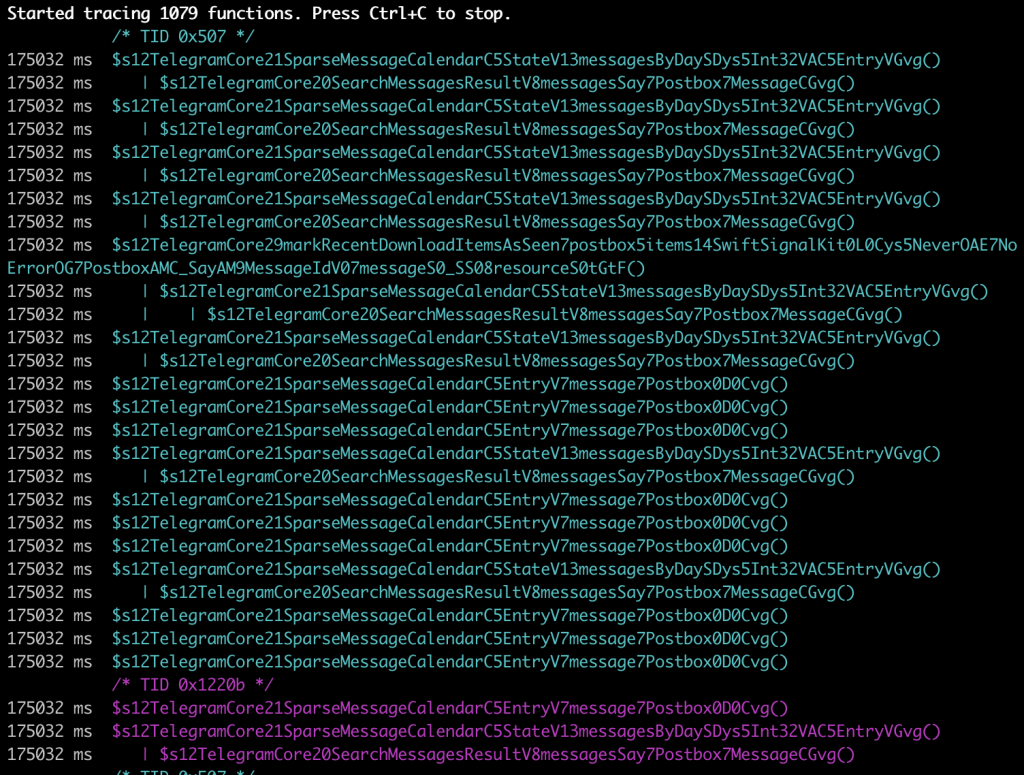
By taking a look at the functions traced, we can immediately recognise that we are dealing with the Swift since the symbols look mangled. And because we are getting a lot of functions that contain message7Postbox or Postbox7Message, let’s exclude them from tracing by using -x frida-trace option. We will also exclude those that contain messagesByDay inside of their mangled names as we are getting too much of them.
frida-trace -U Telegram -i “message” -x “message7Postbox” -x “Postbox7Message” -x “messagesByDay”

We have reduced the number of traced functions and we are not getting the hits as much as before.
Let’s now open a chat and start typing a message and we will immediately see a bunch of xpc_ functions being called. For now, it is enough to know that XPC is a method of IPC(Inter Process Communication) that is used extensively inside iOS for all kinds of things. So, let’s go ahead and exclude them as well by adding -x “xpc_*" to our previous frida-trace command.
Once we type in our message and send it, the following function calls are made:
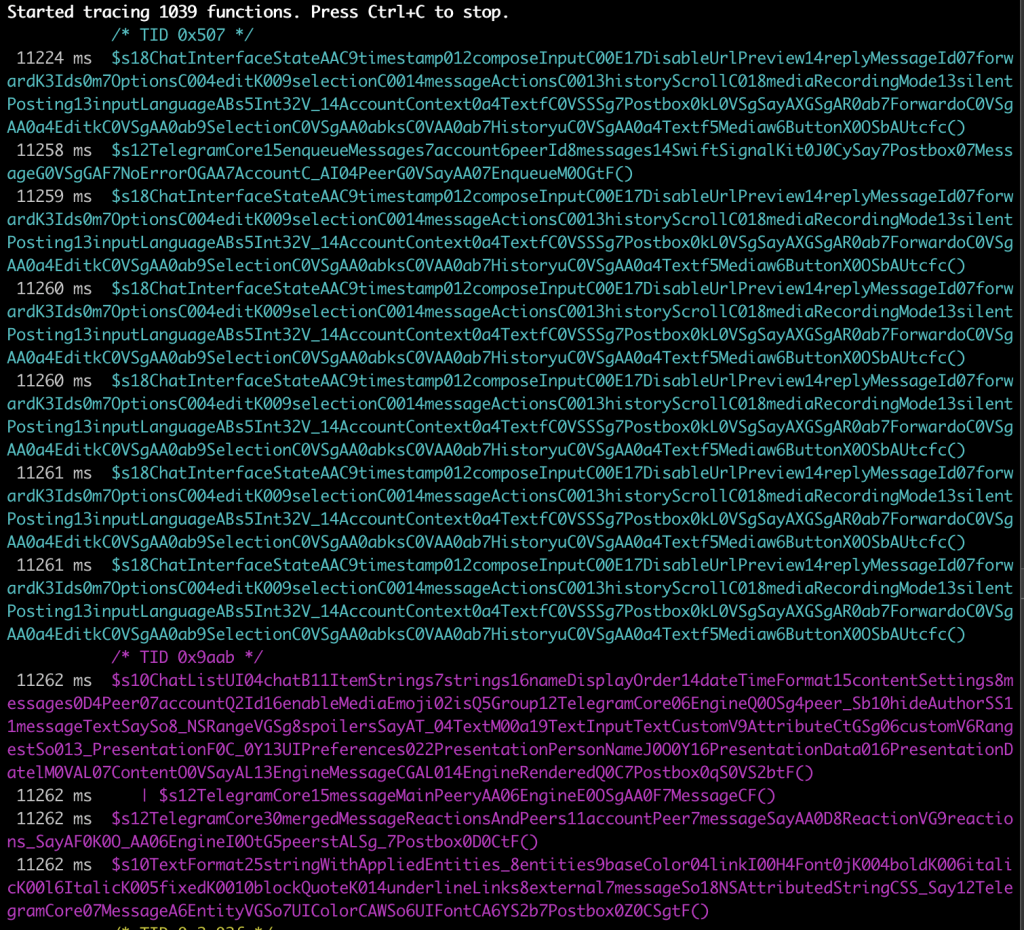
This does indeed looks scary since we are seeing mangled names but if we take a look at all these functions, we can see that the one we can utilise is the latest one because we can see that it is some string formatting involved and as messages are basically strings, we will examine this function.
Full mangled name is: __$s10TextFormat25stringWithAppliedEntities_8entities9baseColor04linkI00H4Font0jK004boldK006italicK00l6ItalicK005fixedK0010blockQuoteK014underlineLinks8external7messageSo18NSAttributedStringCSS_Say12TelegramCore07MessageA6EntityVGSo7UIColorCAWSo6UIFontCA6YS2b7Postbox0Z0CSgtF__.
But before we go any further with arguments examination, let’s see how to get more sense out of this mangled function name.
Swift demangling
Demangling is the reverse process of mangling where we take a mangled function name and make it more readable.
Such functionality is available to us inside libswiftCore.dylib through its swift_demangle function.
swift_demangle function accepts 5 arguments:
- mangled string
- size of the mangled string
- location where to write demangled name ( we can pass NULL )
- size of the buffer for demangled name ( we can pass NULL )
- flags
Since we are working with Frida, we will use its functionality to demangle this function name. The steps that we will take are the following:
- define name of the library (
libswiftCore.dylib) - define flags
- create
NativeFunctionfordlopenfunction (for loading the library) - create another
NativeFunctionfordlsymfunction (for fetching symbol address) - call
dlsymwith handle fromdlopenand the name of the symbol (swift_demangle) - create
NativeFunctionofswift_demangleusing the address from the previous step - wrap all of this inside a function that accepts mangled name
Full code for our script is as following:
let swiftCore = Memory.allocUtf8String("/usr/lib/swift/libswiftCore.dylib");
let RTLD_LAZY = 0x00001;
let RTLD_GLOBAL = 0x00100;
// dlopen accepts two parameters, library path and flags
// and returns the handle to us
let dlopen = new NativeFunction(Module.findExportByName(null, "dlopen"), "pointer", ["pointer", "int"]);
// dlsym accepts two parameters, handle from dlopen and
// symbol name; it returns us pointer to the symbol
let dlsym = new NativeFunction(Module.findExportByName(null, "dlsym"), "pointer", ["pointer", "pointer"]);
let hndl = dlopen(swiftCore, RTLD_LAZY | RTLD_GLOBAL);
let addr = dlsym(hndl, Memory.allocUtf8String("swift_demangle"));
// create native function using the address from dlsym
let swift_demangle = new NativeFunction(addr, "pointer", ["pointer", "int", "pointer", "pointer", "int"]);
function demangle(mangled) {
    // if third parameter is NULL, swift_demangle will allocate
    // the buffer and return it to us
    var ret = swift_demangle(Memory.allocUtf8String(mangled), mangled.length, ptr("0x0"), ptr("0x0"), 0);
    // read the string and return it
    return Memory.readUtf8String(ret);
}
Let’s now load our script and test it out.
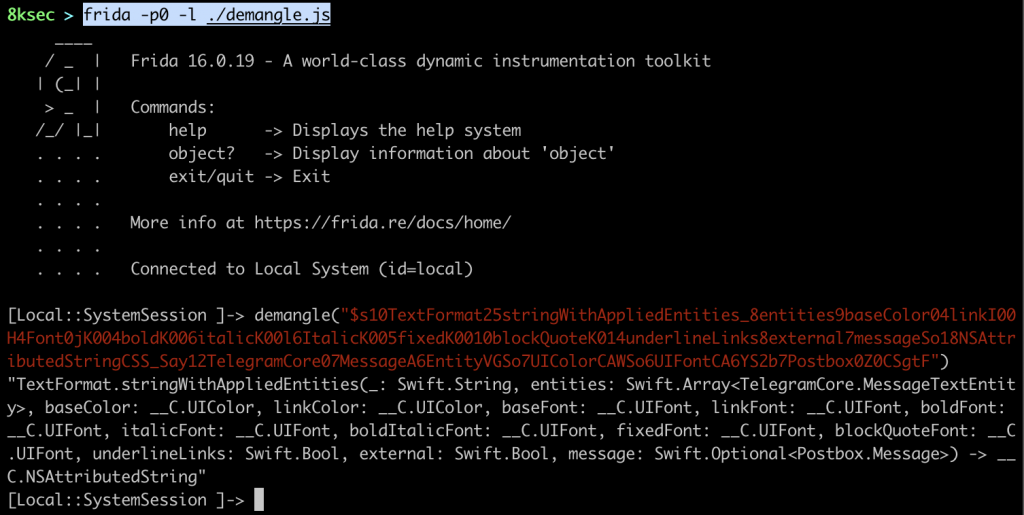
The real function name is TextFormat.stringWithAppliedEntities and it accepts a bunch of arguments, the first one being Swift.String. In the following section we will try to examine it to see whether this is our message.
Inspecting arguments
Since we are dealing with Swift, we cannot just convert it to ObjC object using using ObjC.Object functionality inside the Frida.
The first thing that we will try is to just print the argument, args[0] or if we are talking about the register, that is x0 in arm64 architecture.
Let’s write a simple script that will just intercept this method and print the contents of these two registers (x0 and x1). In Frida, we can access registers using this.context.REGNAME.
var fn  = Module.findExportByName(null, "$s10TextFormat25stringWithAppliedEntities_8entities9baseColor04linkI00H4Font0jK004boldK006italicK00l6ItalicK005fixedK0010blockQuoteK014underlineLinks8external7messageSo18NSAttributedStringCSS_Say12TelegramCore07MessageA6EntityVGSo7UIColorCAWSo6UIFontCA6YS2b7Postbox0Z0CSgtF");
Interceptor.attach(fn, {
    onEnter(args) {
        console.log(this.context.x0);
        console.log(this.context.x1);
    }
});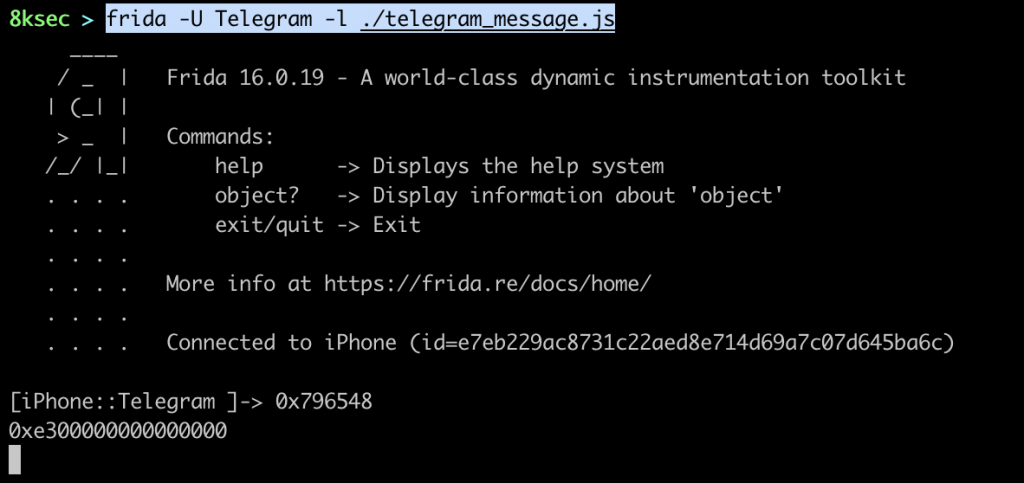
x0=>0x796548x1=>0xe300000000000000
x0 register looks meaning while the x1 registers looks kinda not interesting.
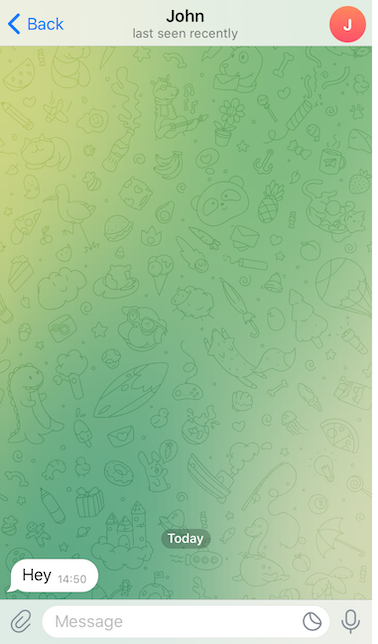
If we take a closer look at the x0 register values we can see that they kinda look like ASCII numbers and if we try to convert these hex numbers to the text we will indeed get our Hey message.
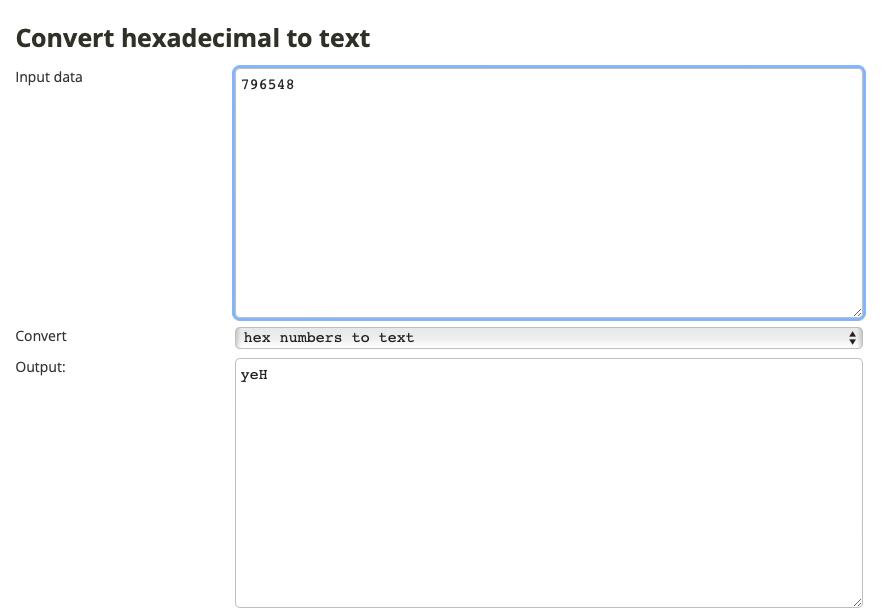
We can see that we got our message but in the reverse, the reason for that is that we are working with Little Endian.
Now, let’s send different messages to see the output of those. In order to test the inputs we will send three different messages:
- Hello
- Hello there
- Hello there, this is a longer message
Ignore the repetition, that is just the way that the application calls this function multiple times. We can extract three distinct messages:
x0 = 0x6f6c6c6548andx1 = 0xe500000000000000x0 = 0x6874206f6c6c6548andx1 = 0xeb00000000657265x0 = 0xf000000000000025andx1 = 0x2849db390
If we try to convert these hex numbers to ASCII we get the following:
0x6f6c6c6548= olleH0xe500000000000000= non-printable0x6874206f6c6c6548= ht olleH0xeb00000000657265= ere0xf000000000000025= non-printable0x2849db390= non-printable
We can conclude the following:
- message less than 9 characters => inside x0 register
- message less than 8 characters => inside x0 and x1 register
- greater than 15 characters => something in x0 and something in x1 register
In order to really understand what is really going on, we need to understand how Swift strings work.
Swift.String
When the Swift strings are passed to the function, they can be passed in two ways:
- on the stack if the size is less than 16 bytes
- on the heap if the size is greater than 16 bytes
If the string is less than 16 bytes, it will be placed in the first two registers, on arm64, those registers are x0 and x1.
If the string is greater than 16 bytes, inside x0 we will have information about the string size inside LSB (Least Significant Byte) and x1 will hold the pointer to the Swift.String structure. Swift.String structure consists of the 32 bytes header, followed by the raw string.
Now that we know how to parse the strings, let move to writing our Frida script for wanted function.
Writing Frida script
Now comes the real part, making the Frida script in order to intercept this function and print its first argument (Swift.String).
Steps that we need to take:
- Find address of the function
- Create a function that will reverse the array and will stop upon finding 0x00
- Run
Interceptor.attachon the address - We will take a first byte inside of the
x0 - If the first byte inside of
x0is0xf0we are dealing with string greater than 15 bytes so we will read string at memory address inside thex1register - Otherwise, read bytes from x0 and store it inside the array
- Reverse that array (because we are working with Little Endian) and convert the bytes into characters and return the string
- If we have not found 0x00 inside the first byte, follow the steps for
x1as we did forx0 - Append messages from
x0andx1together and print the message
var fn = Module.findExportByName(null, "$s10TextFormat25stringWithAppliedEntities_8entities9baseColor04linkI00H4Font0jK004boldK006italicK00l6ItalicK005fixedK0010blockQuoteK014underlineLinks8external7messageSo18NSAttributedStringCSS_Say12TelegramCore07MessageA6EntityVGSo7UIColorCAWSo6UIFontCA6YS2b7Postbox0Z0CSgtF");
function messageFromArray(arr) {
    var reversed = arr.reverse();
    var m = '';
    for (var i = 0; i < reversed.length; i++) {
        if (reversed[i] == 0) {
            break;
        }
        m += String.fromCharCode(reversed[i]);
    }
    return m;
}
Interceptor.attach(fn, {
    onEnter(args) {
        var firstByte = this.context.x0.toString().slice(0,4);
        var message = '';
        if (firstByte == 0xf0) {
            // add 32 because of the header
            var loc = this.context.x1.add(32);
            message = Memory.readUtf8String(loc);
        } else {
            // small string, less than 16 bytes
            var firstArg = this.context.x0.toString().slice(2);
            var firstChars = [];
            // read bytes from x0 and convert them to int
            for (var i = 0; i < firstArg.length; i += 2) {
                var ch = parseInt(firstArg.slice(i, i+2), 16);
                firstChars.push(ch);
            }
            // convert those bytes to string
            var firstMessage = messageFromArray(firstChars);
            // we start reading from the second byte because
            // maximum number of characters is 7 in x1 for Swift.String
            var secondArg = this.context.x1.toString().slice(4);
            var secondChars = [];
            // read bytes from x1 and convert them to int
            for (var i = 0; i < secondArg.length; i += 2){
                var ch = parseInt(secondArg.slice(i, i+2), 16);
                secondChars.push(ch);
            }
            // append the strings from both x0 and x1
            var secondMessage = messageFromArray(secondChars);
            message = firstMessage + secondMessage;
        }
        console.log(`message: ${message}`);
    }
});
Running the Frida Script
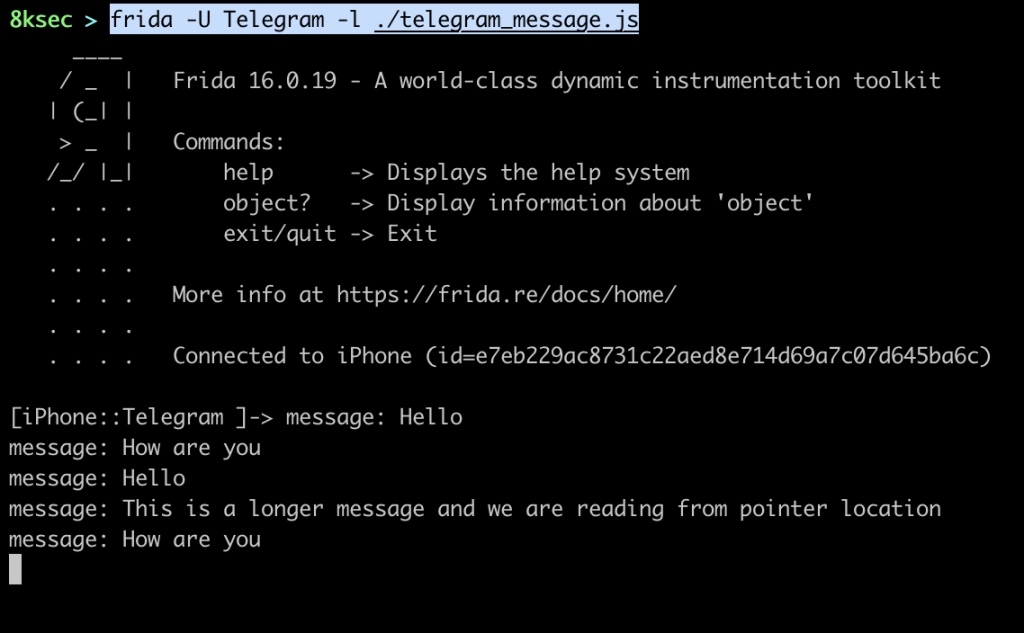
Output of the Frida script:
Inside Telegram application:
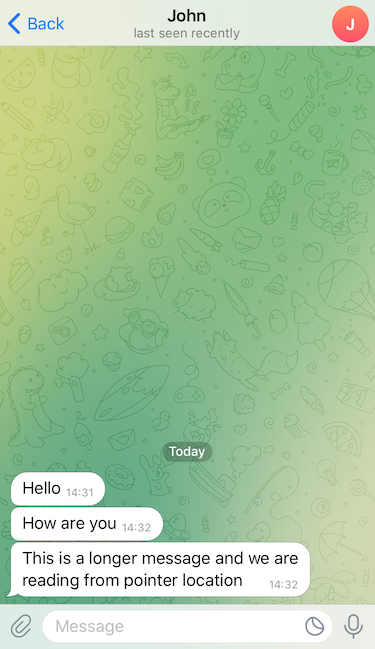
One thing you may notice is that we are seeing some messages multiple times, this is probably due to the application calling this function every time new message has arrived in order to format the text.
GET IN TOUCH
Visit our training page if you’re interested in learning more about these techniques and developing your abilities further. Additionally, you may look through our Events page and sign up for our upcoming Public trainings.
Check out our Certifications Program and get Certified today.
Please don’t hesitate to reach out to us through out Contact Us page or through the Button below if you have any questions or need assistance with Penetration Testing or any other Security-related Services. We will answer in a timely manner within 1 business day.
We are always looking for talented people to join our team. Visit out Careers page to look at the available roles. We would love to hear from you.
References
- https://frida.re/docs/javascript-api/
- https://github.com/apple/swift/blob/main/docs/ABI/Mangling.rst
- https://github.com/apple/swift/blob/main/docs/Runtime.md
- https://github.com/apple/swift/blob/main/docs/ABIStabilityManifesto.md
- https://github.com/apple/swift/blob/aa3e5904f8ba8bf9ae06d96946774d171074f6e5/stdlib/public/core/StringStorage.swift
- https://developer.apple.com/documentation/objectivec/1456712-objc_msgsend?language=_3

